Full Project 👇
Hello doston! Main ek professional video editor hoon aur pichle 7 saalo se is creative editing industry mein kaam kar raha hoon. Main apne YouTube channel “m4editorofficial” (13.6K subscribers) aur Instagram page “m4_editor_official” (145K followers) par apni editing journey share karta hoon. Mera maqsad is website ke zariye aap sabhi beginners ko bilkul free mein real editing knowledge aur practical guidance dena hai.
Vintage Photo Editing Look Alight Motion: Advanced Step-by-Step Guide
Aaj kal Instagram Reels aur YouTube Shorts par 80s aur 90s ka “Vintage Look” sabse zyada trend kar raha hai. Faded colours, film grain, aur light leaks ek aam si photo ko cinematic masterpiece bana dete hain.
Iske liye aapko mehnge PC software ki zaroorat nahi hai. Agar aap mobile par editing karte hain, toh Alight Motion aapka sabse bada hathiyar hai. Is article mein hum aasan shabdon mein seekhenge ki Vintage Photo Editing Look Alight Motion mein kaise create karein, aur usme 3D video effect aur pro-level details kaise add karein.
Vintage Look Aakhir Hai Kya?
Vintage photography ka matlab hai un purane film cameras ki vibe ko recreate karna. Unme perfect sharpness nahi hoti thi; unme ek natural “grain” (daane) hota tha, colours thode pheeke hote the, aur edges par thoda andhera (vignette) hota tha. Alight Motion mein in effects ko layers ka use karke aasani se banaya ja sakta hai.
Alight Motion Mein Vintage Photo Editing Kaise Kare? (Basic to Advanced Steps)
Yahan wo exact steps hain jo main apni professional editing mein use karta hoon:
Step 1: Base Colour Grading (Exposure & Gamma)
Purane cameras ki photos thodi dark aur low contrast wali hoti thi.
- ‘Colour & Light’ menu se ‘Exposure/Gamma’ select karein.
- Exposure ko thoda kam karein (-0.20 se -0.30).
- Vintage photos mein blacks pure black nahi hote, isliye shadows ko halka sa badha dein.
Step 2: Colour Tune Aur Temperature
Vintage photos mein hamesha ek “warm” (peela/narangi) tint hota hai.
- ‘Temperature’ effect add karein aur isey thoda positive (+1500k) ki taraf rakhein.
- ‘Saturation/Vibrance’ add karke saturation ko -15% se -25% tak kam kar dein taaki colours thode faded lagin.
Step 3: Noise Aur Film Grain Add Karna
Bina grain ke vintage photo adhuri hai.
- ‘Blur/Sharpen’ ya ‘Other’ category se ‘Noise’ effect choose karein.
- Amount ko 0.08 se 0.15 ke beech rakhein taaki sirf ek halka sa texture aaye.
Step 4: Vignette Effect
Purane lenses edges par andhera kar dete the.
- ‘Matte/Mask/Key’ section se ‘Vignette’ add karein.
- Size aur feather ko aise adjust karein ki pura focus photo ke centre par aaye.
Pro Level Vintage Hacks (Jo Zyada Log Nahi Jante)
Agar aap apni photo ko bilkul authentic 90s film look dena chahte hain, toh in advanced tips ko zaroor use karein:
1. The FPS Hack (Cinematic Frame Rate)
Purane cameras aaj kal ki tarah 60fps (smooth) par record nahi karte the. Wo 24fps ya usse bhi kam par chalte the. Apne Alight Motion project ki setting banate waqt Frame Rate ko 24 FPS par set karein. Isse aapki 3D movement mein ek natural cinematic aur retro feel aayegi.
2. RGB Split (Chromatic Aberration)
Agar aap purani photos ko dhyaan se dekhein, toh unke kinaron (edges) par colors (Red, Green, Blue) thode alag-alag fail jate the.
- Alight Motion mein ‘Channel Remap (RGB)’ ya ‘Lens Blur’ effect add karein.
- Isse photo ke edges par ek halka sa colour distortion aayega jo 100% real vintage lens ka look deta hai.
3. Glow aur Halation Effect
Purane cameras mein jab light seedhi lens par padti thi, toh ek soft sa glow ban jata tha.
- Apni photo wali layer ko duplicate karein.
- Upar wali layer par ‘Gaussian Blur’ aur ‘Exposure’ (thoda zyada) add karein.
- Blending mode ko ‘Screen’ ya ‘Lighten’ par set karein. Isse photo ke bright parts mein ek bohot hi pyara vintage glow aa jayega.
Powerful Alight Motion Application Se 3D Video Editing Kaise Kare
Apni vintage photo ko Instagram ya YouTube ke liye aur bhi engaging banane ke liye, aap isme 3D movement add kar sakte hain:
- Depth Creation: Background ko Z-axis par peeche push karein aur character ko aage rakhein. Isse real depth banegi.
- 3D Camera Setup: Alight Motion mein ‘Camera’ object add karein. Keyframes lagakar camera ko thoda sa zoom in ya pan karein.
- Camera Shake: Camera layer par ‘Oscillate’ effect add karein. Frequency ko bohot kam (0.50 Hz) rakhein taaki natural handheld camera wali vibe aaye.
Bonus Tip: Smart Work with XML & Overlays
- Vintage XML Files: Agar aap har photo par manual setting nahi karna chahte, toh aap YouTube se “Alight Motion Vintage Look XML” file download kar sakte hain. Isey seedha apne project mein import karein aur ek click mein effects apply karein.
- Dust Overlays: YouTube se “Vintage Film Dust Overlay Black Screen” download karein. Isey apni timeline par sabse upar rakhein aur Blending mode ko ‘Screen’ kar dein.
Best Export Settings For Instagram & YouTube Shorts
Kitni bhi achi editing kar lo, agar export setting galat hai toh quality gir jayegi:
- Resolution: 1080p (FHD)
- Frame Rate: 30 FPS (ya 24 FPS for retro look)
- Quality (Bitrate): High par set karein (lagbhag 15-20 Mbps).
- Tip: H1.264/AVC codec ka use karein taaki social media par upload hone ke baad video pixelated na ho.
Common Mistakes Beginners Should Avoid
- Colours ko over-saturate karna: Vintage look hamesha thoda pheeka (faded) hota hai.
- Zyada Noise/Grain dalna: Zyada grain video ki quality bilkul kharab kar dega.
- Robotic 3D Movement: Camera move karte waqt keyframes ko ‘Ease In/Out’ zaroor karein taaki movement smooth lage.
Conclusion
Doston, Alight Motion mein Vintage Look aur 3D effects banana bohot aasan hai. Bas Exposure, Grain, Camera tools aur in advanced techniques (jaise RGB split aur Glow) ka sahi use karna seekhein. Editing practice se aati hai, isliye aaj hi Alight Motion open karein aur in steps ko try karein. Keep editing aur apne content ko agle level par lekar jayein!
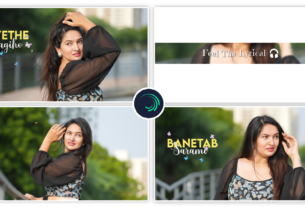
1. Preset 👇🎁
![]()
DWONLOAD
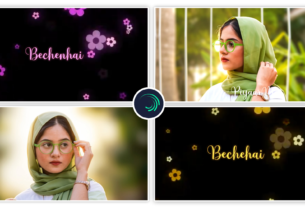
2. Preset 👇 🎁
![]()
Alight Motion Qr Code 👇