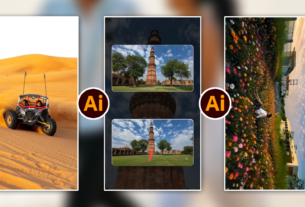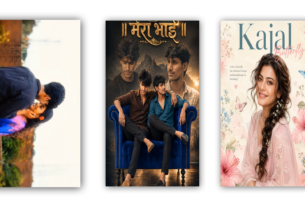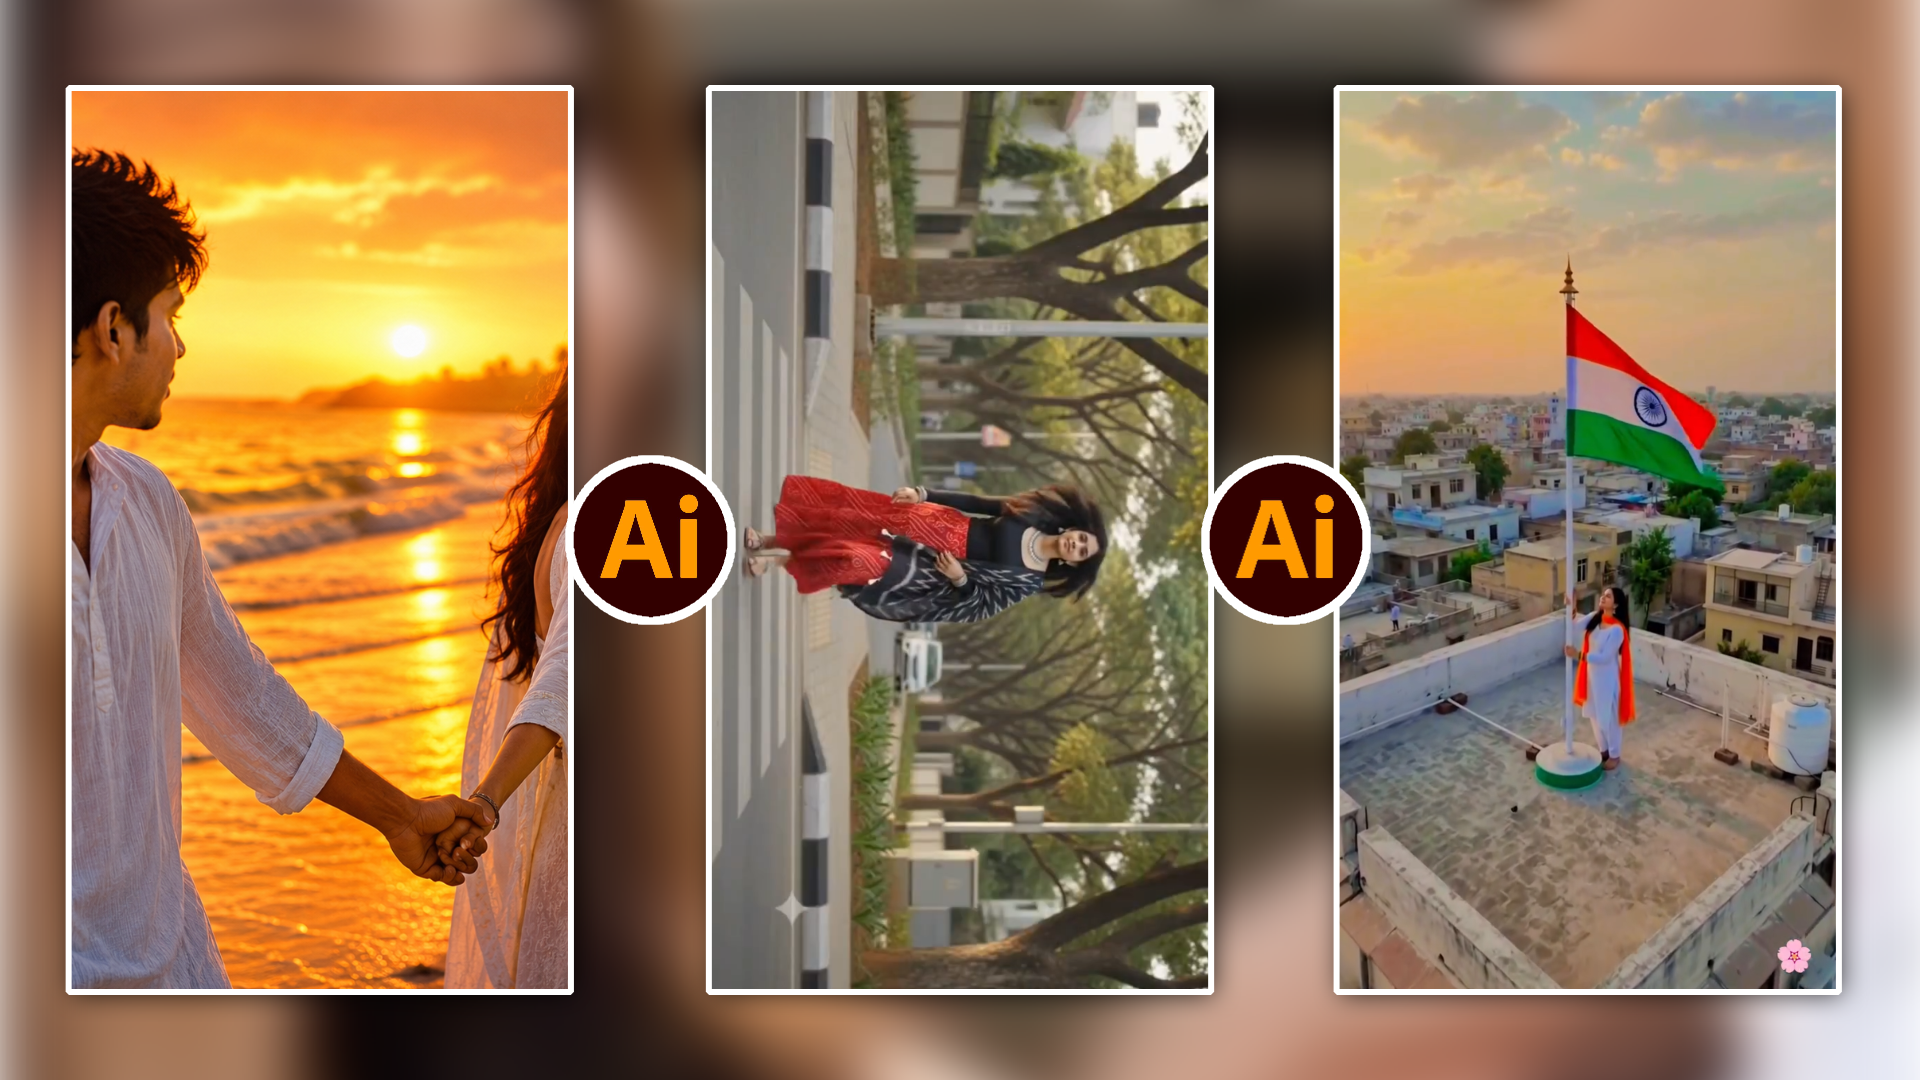
AI Couple Romantic Video Prompt Complete Step-by-Step Guide M4 99
Aaj ke digital era mein content creation ka level bilkul badal chuka hai. Pehle ek simple 5-minute ki video edit karne mein ghanton ka time lagta tha—manually cuts lagana, audio clear karna, captions write karna aur colour grading karna ek bohot bada headache hota tha. Lekin jab se AI (Artificial Intelligence) ne editing industry mein entry li hai, tab se game poori tarah change ho gaya hai.
Agar aap ek beginner hain aur soch rahe hain ki AI ki help se fast, professional aur high-quality content kaise banayein, toh aap bilkul sahi jagah aaye hain. Is comprehensive aur detailed guide mein hum ek aisa AI Video Editing Workflow for Beginners samajhne wale hain jo aapka 70% editing time save karega aur aapke output ke production value ko next-level professional banayega.
What is an AI Video Editing Workflow?
Ek AI Video Editing Workflow ka matlab hota hai apne raw footage ko final video mein convert karne ke liye step-by-step AI tools aur traditional editing techniques ka ek smart, structured system.
Boht se beginners yeh samajhte hain ki AI poori video khud bana deta hai, jo ki ek galat perception hai. Actually, AI aapka ek smart editing assistant hai. Yeh aapke boring, repetitive aur time-consuming tasks (jaise background noise remove karna, dead silence cut karna, auto-captioning aur colour matching) ko seconds mein finish kar deta hai. Isse aapka creative control aapke paas hi rehta hai aur aapka manual effort drastically kam ho jata hai.
AI Workflow Ke Main Advantages:
- Time Efficiency: Ghanton ka manual trimming aur audio cleaning minutes mein convert ho jata hai.
- Consistent Production Quality: Aapki har video mein ek jaisa professional sound aur visual aesthetic maintain rehta hai.
- Low Learning Curve: Complex keyframing aur advance audio plugins ko years tak seekhne ki zarurat nahi padti; simple AI features se beginners bhi pro-level results achieve kar sakte hain.
Phase 1: Pre-Production & Smart AI Scripting Strategy
Video editing hamesha timeline par footage drag karne se pehle shuru hoti hai. Planning jitni strong hogi, editing table par aapka time utna hi kam kharch hoga.
Step 1: AI Tools for Script Structuring & Hook Generation
Beginners sabse badi galti yeh karte hain ki bina kisi structure ke camera on karke bolna shuru kar dete hain. Result? Video mein boht saare unnecessary pauses, repetition aur weak retention hota hai.
- Prompt Engineering Strategy: Aap AI models (jaise ChatGPT, Claude, ya Gemini) ka use karke apni video ka ek structured script aur scene-by-scene storyboard tayar kar sakte hain.
- Practical Prompt Example: “Write a 60-second engaging Instagram Reel script about ‘Top 3 AI Editing Tools’. Break it down into Hook (first 3 seconds), Main Body (with visual cues), and a strong Call-to-Action.”
- Pro Tip: Visual cues pehle se ready hone par aapko pata hota hai ki kis line par konsa B-roll overlay ya screen recording lagana hai, jisse video editing speed double ho jati hai.
Phase 2: Rough Cut & Automated Timeline Setup
Aapne footage record kar li, ab baari hai timeline ko clean karne ki. Manual trimming aur unwanted parts cut karna video production ka sabse tedious step hota hai.
Step 2: Auto Silence & Dead Gap Removal
Raw video mein hum kafi jagah pause lete hain, retakes lete hain, ya ‘umm’ aur ‘ah’ bolte hain. Is rough footage ko manually ek-ek karke cut karne ke bajaye AI silence removers ka use karein.
- Recommended AI Tools: AutoCut, Descript, ya CapCut AI Silence Remover.
- Practical Execution: Aap apne audio threshold (e.g., silence longer than 0.5 seconds) ko set kar sakte hain. AI automatically poore timeline ko scan karke saare dead gaps ko ek click mein delete kar deta hai.
- Time Saved: Is step se aapka 30-40 minute ka manual cutting work sirf 10 seconds mein finish ho jata hai.
Step 3: Text-Based Editing Technology
Aaj kal ke modern video editing software (jaise Adobe Premiere Pro, DaVinci Resolve, aur Descript) mein Text-Based Editing ka revolutionary feature milta hai.
- How it Works: AI aapki poori video ki speech ko real-time text transcript mein convert kar deta hai.
- Workflow: Aapko timeline par razor tool chalane ki zarurat nahi hai. Bas transcript document par jaayein, jin words ya paragraphs ko aap hataana chahte hain unhe text ki tarah select karke ‘Delete’ dabayein. Timeline par se wo video clip apne aap cut ho jayegi.
Phase 3: AI Audio Enhancement & Studio-Quality Polish
Ek video ka 80% success rate audio quality par depend karta hai. Viewers, thodi average video quality tolerate kar sakte hain, lekin bad audio sunte hi video ko instant swipe away kar dete hain.
Step 4: One-Click Background Noise & Reverb Removal
Ghar par shoot karte waqt ceiling fan ki awaaz, traffic noise, ya room echo aana normal hai. Traditional editing mein iske liye Equalisers (EQ), Noise Gates, aur Compressors set karne padte hain jo beginners ke liye boht complex hote hain.
- Game-Changer Tool: Adobe Podcast AI (Enhance Speech).
- How to use: Apni raw audio file ko MP3/WAV format mein export karke Adobe Podcast par upload karein.
- The Magic: AI noise, background hum, aur room reverb ko detect karke filter out kar deta hai, jisse aapki normal smartphone recording bhi ek expensive condenser microphone jaisi crisp aur punchy sounding ban jati hai.
Step 5: AI Sound Design & Dynamic Background Music
Audio ko engaging banane ke liye background music aur sound effects (SFX) ka sahi placement zaroori hai.
- AI Voiceover: Agar aap apni voiceover use nahi karna chahte, toh ElevenLabs jaisa tool natural human emotions, pauses, aur tone ke sath ultra-realistic AI voiceover generate karta hai.
- Automated Sound Effects: Visual cuts par woosh, pop, ya braam sound effects lagane ke liye aap AI sound generators ya smart stock libraries ka use kar sakte hain jo aapke video ke pacing ke hisab se audio mix adjust kar dete hain.
Phase 6: Dynamic Visuals, B-Rolls & Smart Captions
Talking-head videos (jahan ek insaan camera ke samne bolta hai) mein audience retention maintain karne ke liye har 3 se 5 seconds mein visual change hona zaroori hai.
Step 6: AI-Generated B-Rolls & Dynamic Overlays
Agar aapke paas apni video ke context se match karta hua real footage nahi hai, toh stock websites par ghanton search karne ki zarurat nahi hai.
- Generative AI Video Tools: Aap Runway Gen-2, Pika Labs, ya Luma Dream Machine par simple text prompt likhkar high-quality custom B-roll video clips generate kar sakte hain.
- Example Prompt: “Cinematic close-up of a futuristic robot editing a video on a glowing holographic screen, 4k resolution, hyper-realistic.”
- Smart Stock Auto-Match: CapCut aur InVideo jaise tools aapke script ke key terms ko analyse karke automatically matching royalty-free clips aur GIFs timeline par place kar dete hain.
Step 7: Dynamic Auto-Captions & Word Highlighting
Data ke mutabiq, social media par 80% se zyada log audio mute karke videos scroll karte hain. Isliye screen par subtitles/captions dikhana retention ke liye extremely vital hai.
- Automated Subtitle Engine: CapCut Auto-Captions, Veed.io, ya Premiere Pro Captioning ka use karke 98% accuracy ke saath automatic captions generate karein.
- Styling Best Practices:
- Bold aur easily readable fonts (jaise Montserrat, Kinetic, ya Anton) ka use karein.
- AI automatic keyword highlighting feature ko ON karein, jisse important words Yellow, Green, ya Red colour mein pop-up ho sakein.
- Captions ko screen ke lower-middle area mein place karein taaki UI elements (like Instagram buttons) unhe cover na karein.
Phase 5: AIColourr Grading & High-Resolution Export
Final polishing aapki video ko ek amateur feel se nikalkar ek cinematic brand look deti hai.
Step 8: AI-Powered Colour Matching & Grading
Colour grading complex colour science par base hoti hai jise master karne mein saalon ka experience lagta hai. Lekin AI ki madad se aap reference images ka look direct apni video par apply kar sakte hain.
- Colour Match Feature: DaVinci Resolve aur Premiere Pro mein built-in AI Colour Match feature hota hai.
- Workflow: Aapko bas apni pasand ki kisi bhi film ya high-end video ka ek reference screenshot dena hota hai. AI aapke shot ke skin tones, shadows, aur highlights ko analyse karke target video par exact colour palette apply kar deta hai.
Step 9: AI Video Upscaling & Final Rendering
Agar aapne video low lighting mein ya kisi purane smartphone se record ki hai, toh output blurry lag sakta hai.
- AI Enhancement: Export se pehle ya baad mein Topaz Video AI jaisey tools ka use karke aap 1080p video ko 4K Crisp Quality mein upscale kar sakte hain. AI missing pixels aur sharpness ko recreate kar deta hai bina video ko distort kiye.
Bonus Tip: Time-Saving Editing Preset Workflow

Prompt👇
A PICTURESQUE SCENE AMIDST SNOWY MOUNTAINS, WHERE A YOUTH WEARING AN OUTFIT IN THE COLORS OF THE TRICOLOR SLOWLY RUNS INTO THE FRAME. INITIALLY, THE TRICOLOR IS NOT VISIBLE, BUT AS THE CAMERA PANS, A WAVING TRICOLOR APPEARS IN THE BACKGROUND, AND THE YOUTH LOOKS TOWARDS THE TRICOLOR AND PROUDLY SALUTES WITH ‘JAI HIND’, IN DSLR QUALITY WITH CINEMATIC LIGHTING AND A SHALLOW DEPTH OF FIELD. AFTER 8 SECONDS, THE CAMERA SLOWLY ZOOMS OUT AND MOVES UPWARDS INTO A DRONE SHOT.
Girl editing

Photo Prompt 👇
Video Prompt 👇
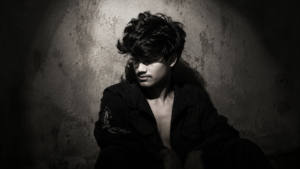
Prompt👇
A cinematic low-key portrait of a young man with medium-length wavy hair partially covering one eye, faint mustache, wearing a black open-collar jacket with subtle sleeve graphics, sitting against a textured concrete wall. Dramatic single overhead spotlight creating strong shadows across the face, moody noir atmosphere, black and white with muted gray tones, high contrast, soft film grain, realistic skin texture, deep shadows, mysterious expression looking slightly to the side, centered composition, minimal background, editorial fashion photography, ultra-realistic, 85mm lens, f/1.8, shallow depth of field, HDR, 8K, dark aesthetic, volumetric lighting.”
Photo size 16:9 ratio.
Song Link 🔗 👇
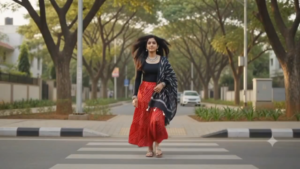
Video Prompt 👇
AI Image Generation Prompt
Prompt: A split/dual perspective aesthetic photo set on a tree-lined city street with warm sunlight filtering through the canopy.
First Character (Man): A young South Asian man wearing round wire-rimmed glasses, a dark brown button-down shirt over a white inner shirt, and off-white relaxed trousers. He is leaning coolly against a sleek dark motorcycle parked on the roadside, with a luxury sports car (Porsche) blurred in the background. Close-up: Expressive eyes with a reflective, thoughtful gaze.
Second Character (Woman): A young South Asian woman walking gracefully across a pedestrian zebra crossing. She is dressed in an elegant ethnic outfit featuring a black top, a vibrant red patterned skirt/saree with traditional geometric motifs, and a dark patterned dupatta draped over her shoulder. She wears silver statement jhumka earrings, a small bindi, and has her dark wavy hair flowing naturally. Close-up: Soft, emotive eye contact looking toward the camera.
Style & Atmosphere: Cinematic 35mm film photography, natural golden hour lighting, shallow depth of field with soft bokeh, candid and emotional storybook vibe, rich color tones, highly detailed texture.
Pro Editor Secret: Apne har project mein zero se start karne ki galti mat karein! Ek baar jab aap apna favourite caption style, background music ducking level, sound effects kit, aur colour LUTs final kar lein, toh unhe Editing Presets/Templates ki tarah save kar lein. Modern AI editors mein aap ek click se poore workflow preset ko nayi video par paste kar sakte hain. Is single habit se aapki weekly content creation speed 3x fast ho jayegi.
Step-by-Step Summary: The Ideal AI Editing Process
Beginners ke liye sabse simple aur efficient workflow sequence neeche diye gaye steps
- Step 1: Raw Video Recording & File Organisation
- Step 2: AI Scripting & Scene-by-Scene Planning
- Step 3: AI Silence Cut & Text-Based Rough Trimming
- Step 4: Adobe AI Audio Cleanup & Reverb Removal
- Step 5: AI B-Rolls Generation, Overlays & Visual Effects
- Step 6: Auto-Captions Generation & Word Highlighting
- Step 7: AI-Powered Colour Matching & Aesthetic Grading
- Step 8: Final High-Bitrate 4K Video Render & Export
Conclusion
AI video editing tools beginners ke liye ek zabardast asset hain, lekin hamesha yaad rakhein ki AI aapka assistant hai, aapka replacement nahi. Secret yeh hai ki aap AI ka use apne boring aur repetitive technical tasks ko fast karne ke liye karein, aur apna bacha hua time Storytelling, Emotion, Pacing aur Creative Hooks par spend karein.
Is AI Video Editing Workflow for Beginners ko apne agle project mein implement karein, step-by-step practice karein, aur dekhein ki kaise aapka editing speed aur video quality dono fast-track par improve hote hain. Keep creating and keep experimenting!