Namaste dosto! Mera naam MD Maqsood hai aur main pichhle 7+ saalon se visual media, post-production aur photo-video editing industry mein active work kar raha hoon. Apne digital presence YouTube channel (m4editorofficial – 13.6K+ subscribers) aur Instagram (m4_editor_official – 145K+ followers) ke madhyam se main daily practical editing tutorials aur emerging visual tech par content deliver karta hoon. Is platform ko create karne ka mera direct mission yehi hai ki complex modern software techniques aur AI workflows ko simplify karke beginners tak bilkul authentic aur free learning provide ki ja sake.
AI Se Old Photo Restore Kaise Kare? Step-by-Step Complete Guide M4 116
Har ghar ke purane photo album mein aisi tasveerein hoti hain jo hamari sabse keemti yaadon ko sambhale rakhti hain. Waqt ke sath ye physical prints fade hone lagte hain, in par scratches aa jate hain, moisture se paper crack hone lagta hai ya fir inka original colour bilkul yellow ya dull pad jata hai. Kuch saal pehle tak in damage hui tasveeron ko theek karne ke liye ghanto Photoshop par manual clone stamping aur masking karni padti thi jo har kisi ke bas ki baat nahi thi.
Lekin modern artificial intelligence algorithms ne is poore workflow ko revolutionise kar diya hai. Aaj deep learning models facial recognition, generative inpainting aur colour mapping ka use karke seconds mein damage tasveeron ko crisp 4K visual quality mein convert kar dete hain.
Agar aapke paas bhi family ke purane vintage photographs, black and white portraits ya torn pictures hain, toh ye comprehensive practical guide aapke liye hai jisme hum seekhenge ki AI se old photo restore kaise kare aur unhe gallery-ready kaise banaye.
1. Physical Photo Ko Digital Format Mein Accurately Capture Karna
Photo restoration ka sabse pehla aur sabse critical foundation hota hai source file ka clean scan. Agar aapka input scan hi blurry ya distorted hoga, toh AI engine details ko properly predict nahi kar payega.
- Flat Lighting Setup: Photo ko daylight mein kisi flat surface par rakhein. Direct sunlight ya harsh tube light reflection se bachein kyunki paper par aane wala direct glare details ko permanently erase kar deta hai.
- Document Scanner Apps Ka Use: Phone ke default camera se angled photo lene ke bajaye Google PhotoScan ya Adobe Scan jaise applications use karein. Ye apps multiple angles se scan lekar glare aur flash shine ko automatically zero kar dete hain.
- High Resolution Settings: Hamesha maximum resolution (minimum 300 to 600 DPI) par scan save karein. Lossless format jaise PNG ya uncompressed JPEG select karein taaki image data intact rahe.
2. Deep Clean Scratch Removal Aur Generative Inpainting
Purani tasveeron par aam taur par scratches, creases, spots aur phate hue corners hote hain. AI missing pixels ko nearby context ke according automatically rebuild karta hai, jise Generative Inpainting kaha jata hai.
- Targeted Inpainting Tools: Web tools jaise Cleanup.Pictures, Photo-Restore.me ya VanceAI Scratch Repair par apni digital photo upload karein.
- Manual Masking Workflow: Algorithm ko confuse hone se bachane ke liye sirf damage area (line, tear ya ink spot) par brush tool se paint karein. Entire face ya main subject ko mask na karein.
- Pixel Interpolation Check: AI automatically background texture, skin surface ya cloth fabric ko analyse karke missing gap ko fill kar dega. Agar complex cut hai, toh ek baar mein poori line paint karne ke bajaye chhote-chhote segments mein inpaint karein.
3. Facial Reconstruction Aur Facial Feature Enhancer
Low-resolution ya blurry purani tasveeron mein chehre ke main facial details—jaise aankhein, eyelashes, lips aur skin texture—aksar blur ho chuke hote hain. Facial restoration networks features ko sharp aur recognisable banate hain.
- GFP-GAN Aur CodeFormer Technology: Ye advanced AI models hain jo heavily degraded faces ko recover karne ke liye dedicated design kiye gaye hain. Remini, Cutout.pro ya open-source CodeFormer web interfaces is technology par work karte hain.
- Natural Texture Balance: Enhancement level ko balanced rakhein. Oversaturated ya extreme processing se chehra wax figure ya plastic cartoon jaisa lagne lagta hai. Hamesha natural fidelity maintain karein.
- Eye Sockets Aur Hairline Definition: Restore hone ke baad zoom karke check karein ki AI ne eye alignment ya natural skin moles ko artificially alter toh nahi kar diya. Subject ki original identity retain rehni chahiye.
4. Black & White Photos Ka Realistic AI Colourisation
Monochrome ya Sepia-tone tasveeron mein lifelike colours bharna AI ka sabse impressive aspect hai. Modern neural networks image context ko identify karte hain—jaise sky, grass, Indian ethnic clothing, gold jewellery aur human skin tones.
- Contextual Colour Prediction: Palette.fm, Hotpot AI Colouriser ya DeOldify jaise platform par cleaned monochrome image import karein.
- Palette Selection Strategy: AI multiple lighting profiles offer karta hai (e.g., Warm Sunlight, Vintage Studio, Natural Day). Indian portraits ke liye golden-warm aur balanced daylight profiles sabse realistic skin tone produce karti hain.
- Skin Undertone Accuracy: Ye ensure karein ki skin tone over-orange ya neon red na dikhe. Depth maintain karne ke liye subtle shadows aur highlights natural human anatomy ke anusaar honi chahiye.
5. Super-Resolution Upscaling Aur Print-Ready Sharpening
Jab scratch repair, face enhancement aur colourisation complete ho jaye, tab final visual asset ko large canvas ya modern screens ke standard par upscale karna zaroori hota hai.
- AI Upscaler Models: Standard digital interpolation photo ko stretch karke pixelated bana deta hai, jabki Upscale, Topaz Gigapixel AI ya Upscale. Media neural networks naye realistic pixels synthesise karte hain.
- 4X Resolution Scaling: Image ko 2X se 4X scale factor par process karein. Ek 720p ki purani small photo instantly 4K Ultra HD (3840×2160 pixels+) me convert ho jati hai.
- Dynamic Range Balancing: Upscaling ke baad file ko light adjustment tool (jaise Snapseed ya Lightroom Mobile) mein open karein aur shadows ko +5%, contrast ko +8% aur highlights ko carefully -5% pull karein taaki overall visual frame crisp aur balanced feel ho.
Pro Strategy: Layered Workflow Approach For Studio-Grade Results
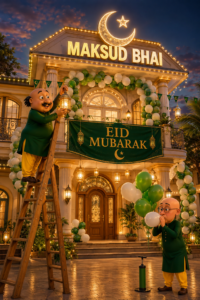
Photo Prompt 👇
Prompt:
A festive 3D animated Disney-Pixar style scene of two cartoon characters decorating a grand two-story house for a celebration at dusk. On the left, a plump cartoon man with a prominent mustache is standing on a tall wooden ladder, hanging a glowing traditional golden lantern. On the right, a slender bald cartoon man wearing round glasses is standing at the entrance, enthusiastically blowing up white and green balloons. Both characters are dressed in festive dark green kurtas with yellow trousers.
The house is decorated with warm fairy lights tracing the rooflines and pillars. The main balcony features a green velvet banner reading “Eid Milad-un-Nabi Mubarak” in ornate golden lettering, surrounded by arches of green and white balloons and Islamic pennant flags. Above the upper roof sits an illuminated glowing crescent moon and star emblem above a prominent, glowing 3D sign that reads “MUSKAN”. Warm ambient lighting, highly detailed textures, vibrant festive atmosphere, cinematic render, 8k resolution.
Customizable Elements:
Name on Roof: Replace “Maksud Bhai” with any desired name.
Occasion Banner: Change “Eid Milad-un-Nabi Mubarak” to “Eid Mubarak”, “Jashn-e-Eid”, or another festive greeting.
Characters: Swap the cartoon duo for customized family characters or individual portraits.
Video Prompt 👇
- Motu: “Assalamu Alaikum Maksud Bhai! Aapko advance mein Jashn-e-Eid Milad-un-Nabi ki bahut-bahut Mubarakbaad.”
- Patlu: “Maksud Bhai, aapki video toh Instagram pe chha gayi hai! Poore 1.3 million views aaye hain, pata hai aapko Yakin Nahi Araha Hai To Aap Check Hi Karlo Ek Waar?”
-
Single-click all-in-one apps par poora depend rehne ke bajaye ek Multi-Stage Sequential Pipeline follow karein.
- Stage 1 (Raw Prep): Scan clean karein aur background spots remove karein.
- Stage 2 (Identity & Geometry): Facial restoration tool run karein taaki facial integrity lock ho jaye.
- Stage 3 (Palette Integration): Colourisation apply karein.
- Stage 4 (Clarity & Grain): Upscale karein aur end mein halka sa 1-2% Organic Film Grain add karein. Digital AI clarity ke sath subtle grain add karne se image completely natural, vintage aur authentic lagti hai aur artificial AI look eliminate ho jata hai.
Bonus Tip: Mobile Editing Tools Se Manual Colour Grading Calibration
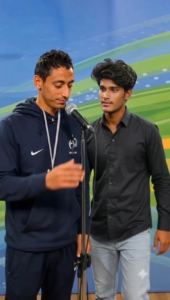
Photo Prompt 👇
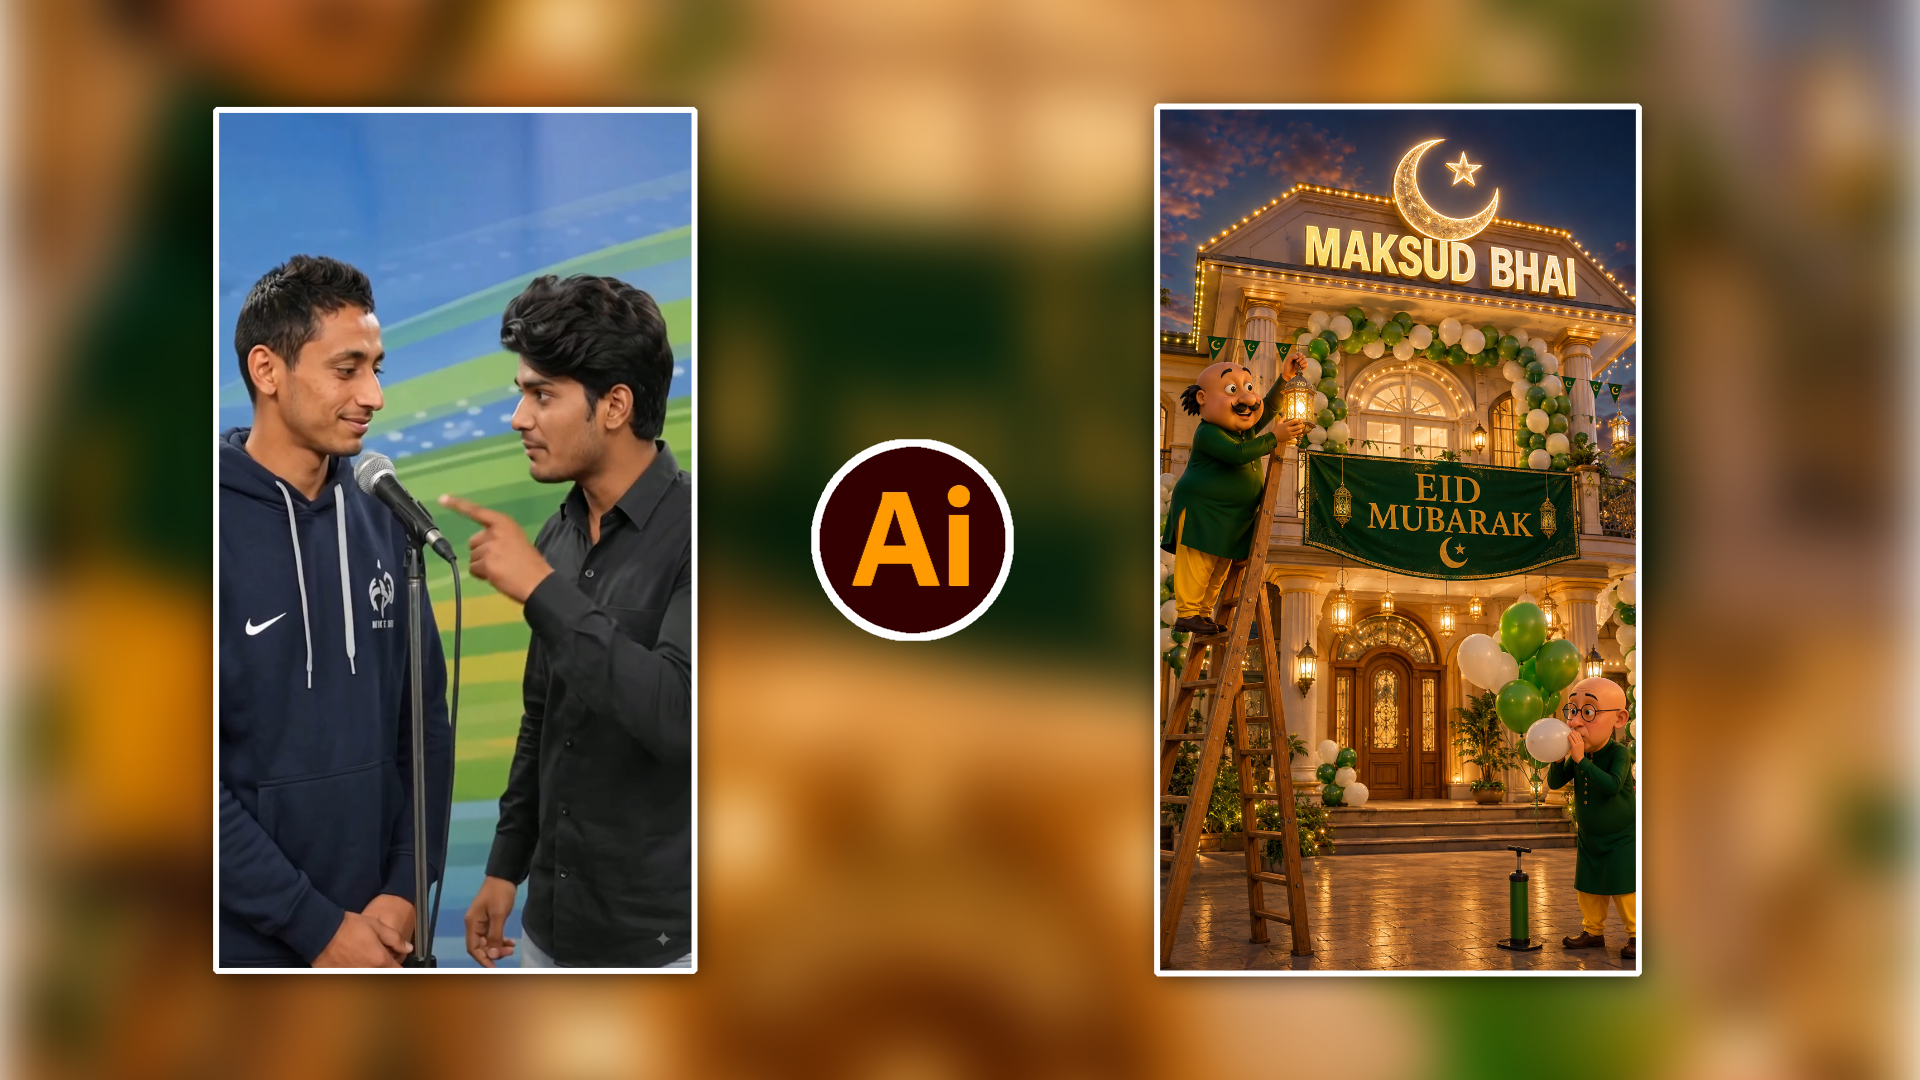
Create an ultra-realistic cinematic vertical 9:16 photograph matching the uploaded reference image as closely as possible.
Scene & Composition: Two young Indian men standing side-by-side indoors at a sports/event venue, positioned in front of a standing microphone. The man on the left is speaking into the microphone while looking slightly downward, wearing a dark navy/black hooded tracksuit with a white lanyard around his neck and subtle white sports logos. His one hand is naturally raised near the microphone. The man on the right stands close beside him, looking toward him with a calm, natural expression, wearing a plain black button-up shirt and light grey trousers.
Pose: Natural candid interaction, both subjects standing upright, realistic body proportions. Microphone and black microphone stand clearly visible in the center foreground.
Background: Colorful indoor sports/event backdrop with curved blue, green and lime-green graphic stripes, softly blurred, realistic venue lighting.
Photography: Photorealistic DSLR quality, natural skin texture, realistic facial details, sharp subjects, shallow depth of field, soft background bokeh, balanced exposure, cinematic color grading, subtle HDR, realistic indoor lighting, high detail, 4K quality.
Important: Preserve the reference subjects’ facial appearance, hairstyle, skin tone, clothing details, body proportions, pose, camera angle and overall composition as closely as possible. Do not beautify or alter facial structure. Keep the image natural and realistic. No extra people, no distorted hands, no duplicate objects, no text, no watermark.
Aspect Ratio: 9:16
Style: Ultra-realistic, cinematic, natural candid event photography, 4K UHD.
Video Prompt 👇
काली शर्ट वाले लड़के का डायलॉग:
“हर time हर किसी वीडियो में तू ओ-ओ… ऊँ-आँ करता रहता है, आज मेरी वीडियो में ‘जय भीम’ बोल!”
माइक पकड़े व्यक्ति का डायलॉग:
“जय भीम!”
AI tools automated processing mein kaafi accurate hote hain, lekin har specific physical light source ki exact warmth ko predict nahi kar sakte. Final image download karne ke baad ek small post-processing tweak aapke result ko standard se extraordinary level par le jata hai.
- Apni restored image ko Lightroom Mobile (Free Version) ya Snapseed mein import karein.
- Curves Tool (RGB): Red curve ke mid-tones ko slightly lift karein aur Blue curve ke shadows ko subtly down karein taaki shadows mein realistic warmth generate ho.
- HSL Colour Mixer: Yellow aur Orange channel ki Luminance ko +10% enhance karein jisse vintage portraits mein skin instantly glowing aur energetic nazar aane lagti hai.
- Selective Masking: Background agar subject se match ho raha ho, toh background ki Saturation -15% drop kar dein jisse viewer ka direct focus main subject ke face par locked rahe.
Conclusion
Digital restoration technology ne historical preservation ko sabhi creators aur regular users ke liye accessible bana diya hai. Purani yaadon ko digitally preserve karne ke liye ab kisi expensive studio par depend rehne ki zaroorat nahi hai. Upar diye gaye step-by-step methodology ko practice karein aur sequential AI tools ka use karke apni family archives aur vintage portraits ko lifelong high-definition visual assets mein convert karein. Regular workflow practice aapko ek pro digital editor ki tarah natural results deliver karne mein train kar degi.