Gemini AI Se Photo Editing Kaise Kare: 2026 Ka Ultimate Aur Complete Guide
Aaj ke digital daur mein, jahan har koi social media par apni best life showcase kar raha hai, ek achhi photo ki kimat hazaron shabdon se zyada hoti hai. Chahe aap Instagram par ek aesthetic feed maintain karna chahte ho, apne business ke liye eye-catching graphics banana chahte ho, ya phir bas apni personal memories ko ek professional touch dena chahte ho—photo editing ab ek luxury nahi, balki ek zarurat ban chuki hai.
Pehle ke time mein photo edit karne ka sidha sa matlab tha ghanton tak bhari-bharkam software ke aage baithna aur complicated tools, layers aur brushes ko sikhna. Lekin ab waqt puri tarah se badal gaya hai. Smart technology ne is kaam ko itna aasan kar diya hai ki ab koi bhi apne phone ya laptop se studio-quality photos tayar kar sakta hai. Aur is naye digital revolution ka sabse bada khiladi hai—Gemini AI.
Agar aap bhi internet par search kar rahe hain ki bina kisi mehnge course ke professional editing kaise ki jaye, toh aap bilkul sahi jagah par hain. Aaj hum detail mein baat karenge ki “Gemini AI se photo editing kaise kare” aur iske top secrets kya hain, jisse aapki normal photos bhi DSLR jaisi dikhne lagengi.
Gemini AI Photo Editing Ke Top 5 Powerful Hacks
Gemini AI sirf sawalon ke jawab dene tak seemit nahi hai. Iski image processing aur editing capabilities bahut hi advance hain. Traditional editing tools mein jahan aapko manually sab kuch karna padta hai, wahin Gemini AI mein aapko sirf sahi “commands” (prompts) dene hote hain. Chaliye dekhte hain wo powerful hacks jo aapki editing ko next level par le jayenge.
Hack 1: Text-Guided Editing Ka Jaadu (Shabdon Se Edit Karein)
Gemini AI ki sabse badi khasiyat iska text-to-image aur image-editing feature hai. Iska matlab hai ki aap apni koi bhi photo upload karke text ke zariye bata sakte hain ki usme kya changes karne hain. Agar aapko apni photo ka pura mood change karna hai, toh aapko bas type karna hoga.
Beginners Ke Liye Tip: Hamesha apne prompts ko detail mein likhein. Sirf “Make it better” likhne ke bajaye, “Enhance the colors, make the sky more blue, and sharpen the subject” likhein. Adjectives ka use karein (jaise: cinematic, vibrant, moody, vintage) taki system ko exact feel samajh aaye aur result aapki soch ke hisaab se mile.
Hack 2: Smart Background Replacement (Bina Mehnat Background Badlein)
Hum sabke paas aisi ek perfect selfie hoti hai jisme hamara face toh bahut achha lag raha hota hai, lekin background mein kachra, photobombers ya khaali deewar hoti hai. Pehle background hatana ek bohot hi frustrating kaam hota tha. Par ab yeh kaam seconds ka hai. Aap simply command de sakte hain, “Remove the background and replace it with a beautiful sunset at a beach” ya “Put the subject on a clean, professional white background.”
Beginners Ke Liye Tip: Jab bhi background replace karein, dhyaan rakhein ki naya background aapke subject ki lighting ke hisaab se match kare. Agar aap e-commerce product photography kar rahe hain, toh solid pastel colors ka background prompt use karein. Isse product pop out hokar dikhta hai aur sales badhne ke chances zyada hote hain.
Hack 3: Magic Eraser Technique (Unwanted Objects Ko Gayab Karein)
Kabhi kabhi ek choti si cheez puri photo kharab kar deti hai—jaise aasman mein udta hua ek random pakshi, zameen par pada hua kachra, ya frame mein achanak aaya koi anjaan shakhs. Is technique ka use karke aap in unwanted elements ko easily remove kar sakte hain. Aapko bas point out karna hota hai ya prompt likhna hota hai ki “Remove the person standing in the background.”
Beginners Ke Liye Tip: Ek sath poori bheed ko hatane ke bajaye, ek-ek karke objects ko remove karne ka command dein. Isse editing zyada natural lagti hai aur edges clear aate hain. Removing ke baad agar jagah thodi ajeeb lage, toh “Smooth out the background area” jaisa ek aur prompt dekar use refine kar lein.
Hack 4: Style Transfer Aur Composition (Creative Merging)
Agar aap ek creative artist, YouTuber ya content creator hain, toh yeh hack aapke bahut kaam aayega. Style transfer ka matlab hai ek photo ke artistic style ko dusri photo par apply karna. Maan lijiye aapke paas aapki ek simple portrait photo hai, aur aap chahte hain ki wo ek oil painting ya 3D cartoon style mein convert ho jaye. Aap easily yeh command de sakte hain.
Beginners Ke Liye Tip: Reference ke tor par aap kisi famous painter (jaise Van Gogh style) ya art style (jaise Pop Art, Cyberpunk, Cinematic lighting) ka naam apne prompt mein de sakte hain. YouTube thumbnails banane ke liye multiple elements ko merge karne ka command dena bhi ek zabardast trick hai.
Hack 5: Perfect Lighting Aur Color Correction
Kayi baar photo dull lagti hai kyunki lighting sahi nahi hoti. Ek professional editor colors balance karne mein ghanton bita deta hai. Gemini AI ke sath, aap simple language mein color grading karwa sakte hain. Aap command de sakte hain, “Increase the contrast, make the shadows darker, and add a warm cinematic tone to the image.”
Beginners Ke Liye Tip: Agar raat ki photo dark aayi hai, toh “Brighten the subject and reduce noise in the shadows” try karein. Mood set karne ke liye, “Add dramatic studio lighting from the left side” jaise prompts ka use karein jisse photo mein depth aa jaye.
Gemini AI Ke Liye Perfect Prompts Kaise Likhein? (Master Formula)
Sabse bada sawal jo nayaye users puchte hain wo yeh hai ki “Hum AI ko kya bolen ki wo wahi kare jo hum chahte hain?” AI puri tarah se aapke diye gaye instructions par depend karta hai. Agar aapka prompt (command) weak hoga, toh photo bhi normal hi aayegi. Yahan ek master formula aur kuch examples diye gaye hain jisse aap ek pro prompt writer ban sakte hain.
Prompt Likhne Ka Formula:
Subject + Action/Environment + Lighting + Mood/Style + Extra Details
Jab bhi prompt likhein, is sequence ko follow karein. AI ko pehle batao ki main cheez (subject) kya hai, phir wo kahan hai (environment), wahan roshni kaisi hai (lighting), aur overall photo kaisa dikhna chahiye (mood).
Kuch Copy-Paste Prompt Examples:

Prompt 👇🎁
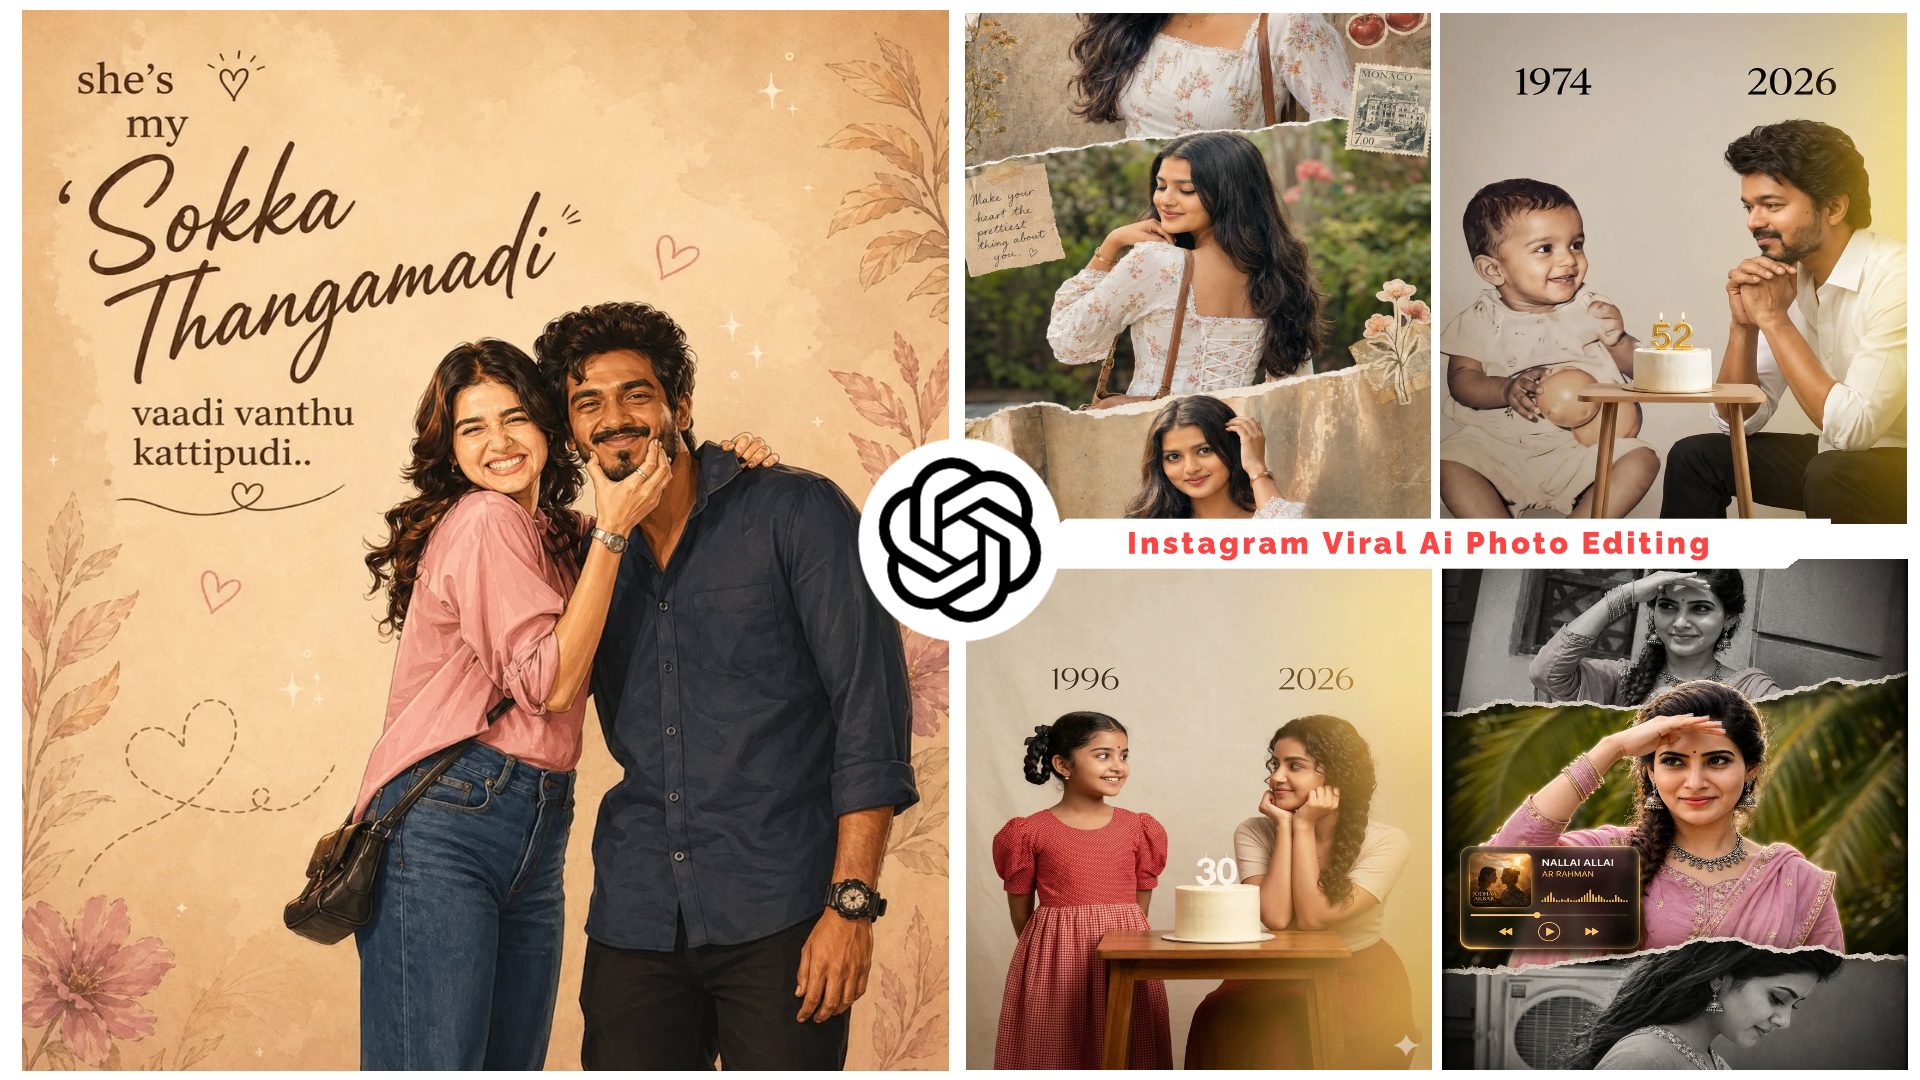
Use only the uploaded face (identical in all panels).Create an ultra-realistic 3-panel vertical collage (top/middle/bottom) of the same young woman.Outfit: White floral cotton kurti, square neckline (front/back), fited bodice with
corset lace-up, long bell sleeves with lace
trim. Minimal gold jewelry + shoulder
handbag. Same hair (long, slightly
voluminous) and styling in all panels.
Top: Close-up side pose, one arm raised, soft confident expression, warm lighting, textured background.
Middle: Back pose, hand under chin, eyes closed smiling, natural daylight, outdoor garden.
Bottom: Mid-shot front pose, hand on head, looking sideways, warm sunlight, slightly grainy backdrop.
Style: Ultra-realistic scrapbook collage with torn paper edges, vintage textures, stickers (cherries/flowers), stamps, handwritten notes. Cohesive across all pannel
Prompt👇🎁
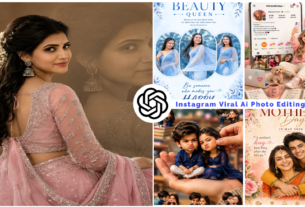
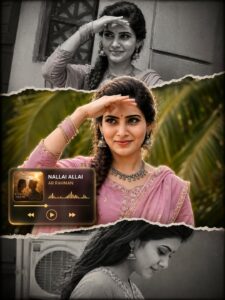
Vertical phone-aspect portrait collage of the same young Indian woman wearing a pink traditional salwar kameez with gold embroidery trim, silver necklace, silver jhumka earrings, and pink-lavender glass bangles – in three stacked panels separated by ton paper edges:
Panel 1 (top, -45% height): Black-and-white photograph – subject shielding eyes looking sideways, hand raised to forehead, smiling, standing against an architectural wall with window behind her. Grainy film aesthetic, high contrast monochrome.
Panel 2 (middle, full-color, cutout style): Vibrant colour – subject looking forward with a soft playful smirk, hand raised shielding her eyes, lush tropical palm leaves blurred behind her. Subject cut out slightly beyond the torn edges above and below. Warm skin tones, vivid pink outfit, natural bokeh background. Slight bloom glow on highlights.
Panel 3 (bottom, ~35% height): Black-and-white side profile, subject looking down gently, long black hair visible, air-conditioning un un
Prompt👇🎁
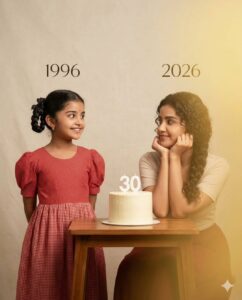
2004 A CONCEPTUAL, EMOTIONAL SPLIT-TIME PHOTOGRAPH ILLUSTRATING AN INDIAN
MAN MEETING HIS 1ST YEAR CHILD. THE COMPOSITION FEATURES TWO FIGURES SITTING ACROSS FROM EACH OTHER AT A SMALL, MINIMALIST TABLE AGAINST A CLEAN, SOFT GRAY STUDIO BACKGROUND. ON THE LEFT IS A TAMILNADU MAN, DEPICTED ENTIRELY IN BLACK AND WHITE. HE HAS SHORT DARK HAIR, WEARS A LIGHT-COLORED CASUAL T-SHIRT, AND IS SMILING GENTLY AS HE LOOKS UP TOWARD THE MAN. FLOATING IN ELEGANT, SERIF TYPOGRAPHY ABOVE HIS HEAD IS THE YEAR “2004”. ON THE RIGHT IS THE ADULT VERSION OF THE BOY, DEPICTED IN WARM, NATURAL FULL COLOR. HE HAS NEATLY STYLED DARK HAIR, WEARS A SMART-CASUAL MAROON SHIRT, AND IS RESTING HIS CHIN THOUGHTFULLY ON HIS HANDS, ELBOWS ON THE TABLE. HE IS LOOKING BACK AT HIS YOUNGER SELF WITH A FOND, AFFECTIONATE SMILE, FLOATING IN MATCHING SERIF TYPOGRAPHY ABOVE HIS HEAD IS THE YEAR “2026”. IN THE DEAD CENTER OF THE TABLE BETWEEN THEM SITS A SIMPLE, SMOOTH WHITE FROSTED BIRTHDAY CAKE. ON TOP OF THE CAKE ARE METAL

Prompt👇🎁
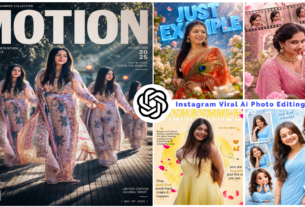
Transform the uploaded photo of two girls taking a mirror selfie into a warm, aesthetic digital illustration poster. Keep their original pose, expressions, hairstyle, and outfits unchanged. Apply a soft, smooth cartoon/illustration style with clean outlines and subtle shading. Use a warm beige / pastel brown background with a minimal, cozy vibe. Add cute hand-drawn elements like small hearts, sparkles, and doodles around them. Place stylish typography on the left/top side
with a mix of cursive and bold fonts. The text
should read: she’s my ‘Sokka Thangamadi’
vaadi vanthu kattipudi.. Make “Sokka Thangamadi” bigger in a handwritten cursive style, and keep the rest in a simple elegant font. Maintain a romantic, best-friend comfort vibe. Ensure the composition is balanced with enough empty space for the text. High quality, Instagram poster style.””Transform the uploaded photo of two girls taking a mirror selfie into a warm, aesthetic digital illustration poster. Keep their original pose, expressions, hairstyle, and outfits unchanged. Apply a soft, smooth cartoon/illustration style with clean outlines and subtle shading. Use a warm beige / pastel brown background with a minimal, cozy vibe. Add cute hand-drawn elements like small hearts, sparkles, and doodles around them. Place stylish typography on the left/top side with a mix of cursive and bold fonts. The text should read: she’s my ‘Sokka Thangamadi’ vaadi vanthu kattipudi..
Make “Sokka Thangamadi” bigger in a handwritten cursive style, and keep the rest in a simple elegant font. Maintain a romantic, best-friend comfort vibe. Ensure the composition is balanced with enough empty space for the text. High quality, Instagram poster style.”
Is formula ko use karke aap kisi bhi simple photo ko ek masterpiece mein badal sakte hain.
Gemini AI Photo Editing Ke Kuch Important Points (Zarur Padhein)
Ek complete guide tabhi poori hoti hai jab aapko pros ke sath-sath kuch ground rules bhi pata hon. Agar aap chahte hain ki aapki editing nakli (fake) na lage aur bilkul natural dikhe, toh in important points ko hamesha yaad rakhein:
- Originality Maintain Karein: AI ka use photo ko behtar banane ke liye karein, na ki use puri tarah se ek fake image banane ke liye. Agar aap apne face ke features hi badal denge, toh photo ki asli khoobsurati chali jayegi.
- Step-by-Step Edit Karein: Ek hi baar mein lamba-chauda prompt dene se behtar hai ki process ko steps mein baante. Pehle lighting theek karein, phir background change karein, aur end mein colors adjust karein.
- High-Quality Original Photo Use Karein: AI tabhi best result deta hai jab upload ki gayi photo ki quality thik ho. Agar photo bahut zyada blur ya pixelated hogi, toh output bhi compromise ho sakta hai.
- Edges Par Dhyaan Dein: Jab aap background change karte hain, toh subject ke baalon (hair) aur kapdon ke kinaron (edges) par zaroor dhyaan dein. Agar wahan thodi kami lage, toh dubara prompt dekar use refine karein.
- Patience Rakhein: Zaroori nahi ki pehli baar mein hi perfect result mil jaye. Agar result pasand na aaye, toh apne prompt ke shabdon ko thoda badal kar wapas try karein.
Bonus Tip: Filters Aur Presets Ko Smartly Use Karein
AI prompts aur editing ke baad bhi ek aakhri step bachta hai. Chahe aap koi bhi tool use kar rahe hon, default filters ko 100% intensity par kabhi use mat karein.
Pro Approach: Jab bhi aap edit ki hui photo par koi aakhri filter lagayen, uski opacity ya intensity ko 40% se 60% ke beech mein rakhein. Isse photo ka original texture barkarar rehta hai aur ek subtle, professional look milta hai. Aap command mein likh sakte hain, “Apply a very subtle vintage film grain effect.” Yeh choti si trick aapki photo ko over-edited aur over-saturated dikhne se bachati hai.
Conclusion: Apni Creativity Ko Nayi Udaan Dein
Photo editing ab koi aisa mushkil kaam nahi reh gaya hai jiske liye aapko mahino ki training ya bhari fees deni pade. “Gemini AI se photo editing kaise kare” is sawal ka sabse asaan aur sidha jawab yehi hai ki—apni imagination ko shabdon mein dhalna sikhein aur experiment karne se na darein.
Ek baar jab aap sahi prompts likhna aur AI ko guide karna seekh jayenge, toh aap ghanton ka kaam minton mein kar lenge. Upar diye gaye master formula, hacks aur important points ke sath ab aapke paas wo sari knowledge hai jo ek basic user ko pro editor bana sakti hai.
Chahe aap Instagram reels ke liye thumbnail bana rahe hon, apne blog ke liye ek feature image tayar kar rahe hon, ya apni family trip ki photos ko enhance kar rahe hon—aaj hi apni koi purani photo uthaiye aur in techniques ka use karke usme nayi jaan daal dijiye. Asli magic tools mein nahi, aapki creativity mein chupa hai!