10 Chatgpt Prompt 👇
Hello creators! Main ek professional video editor hoon aur is creative field mein mujhe 7+ years ka practical experience hai. Agar aap Instagram par mere page “m4_editor_official” (jahan hamari family 145K followers ki hai) ya YouTube channel “m4editorofficial” (13.6K subscribers) se jude hain, toh aap jante honge ki main hamesha real aur actionable editing secrets share karta hoon. Mera primary goal is website ke madhyam se aap sabhi beginners ko trending AI techniques, practical guidance, aur genuine editing skills bilkul free mein sikhana hai, taaki aap sabhi apni skills ko ek pro level tak le ja sakein.
One-Click AI Photo Enhancement: Apni Normal Photos Ko Pro Level Kaise Banayein (Detailed Step-by-Step Guide) M4 74
Aaj ke is fast-paced digital zamane mein, chahe aap ek content creator hon, YouTube vlogger hon, ya phir ek freelance editor, high-quality aur eye-catching images ki demand har jagah sabse zyada hai. Pehle ke time mein kisi ek blur, dark, ya low-quality photo ko sharp karne aur uske colors ko manually fix karne mein Photoshop par ghanto lag jate the. Lekin aaj, Artificial Intelligence (AI) ne is purane process ko puri tarah se badal kar rakh diya hai.
Kya aapne kabhi socha hai ki sirf ek single click mein aapki low-quality photo ek DSLR-level ki crisp, sharp, aur vibrant image mein convert ho sakti hai? Ji haan, yahi magic hai One-Click AI Photo Enhancement ka. Aapke pichle feedback ko dhyan mein rakhte hue, is article mein main aapko ek detailed step-by-step process bataunga, jisse koi bhi beginner is technology ka sahi tarike se use karke apne content ki quality ko easily boost kar sakta hai.
One-Click AI Photo Enhancement Aakhir Kya Hai?
Agar hum isey simple aur asaan shabdon mein samjhein, toh One-Click AI Photo Enhancement ek aisi advanced AI technology hai jahan powerful algorithms aapki photo ke chote-chote pixels ko deeply analyze karte hain aur automatically usme missing details ko add karte hain.
Jab aap kisi traditional aur purane mobile software mein image ki sharpness badhate hain, toh photo mein ‘noise’ (chote-chote daane) aane lagte hain aur image bahut artificial lagne lagti hai. Lekin AI bilkul alag tarike se kaam karta hai. In AI models ko millions of high-quality professional photos par train kiya jata hai. Jab aap apni blur photo in tools mein upload karte hain, toh AI automatically samajh jata hai ki ek real human face, skin texture, ya natural landscape kaisa dikhna chahiye, aur wo khud se naye aur sharp pixels generate karta hai.
Detailed Step-by-Step Process: One-Click AI Photo Enhancement Kaise Use Karein?
Agar aap chahte hain ki aapki photo ekdam professional lage aur usme koi fake AI look na aaye, toh aapko ek proper workflow follow karna hoga. Yahan main aapko ek universal step-by-step process bata raha hoon jo almost har AI enhancement tool (jaise Remini, Topaz, ya Canva AI) par apply hota hai:
Step 1: Apne Project Ke Liye Sahi AI Tool Select Karein
Sabse pehle aapko apni zarurat ke hisaab se sahi tool choose karna hoga. Agar aap mobile par edit kar rahe hain aur sirf face ko sharp karna hai, toh Remini – AI Photo Enhancer ya EPIK best hain. Agar aap PC par high-end thumbnail ya client work kar rahe hain, toh Topaz Photo AI ya Photoshop (Neural Filters) ka use karein. Sahi tool ka selection aapke final output ki quality decide karta hai.
Step 2: Original High-Resolution Image Import Karein
Apne AI software ko open karein aur apni sabse best available raw image upload karein. Pro Tip: WhatsApp ya Facebook se download ki gayi compressed image use karne se bachein. Hamesha try karein ki aap original camera roll wali image (JPEG ya PNG format) hi software mein import karein taaki AI ko process karne ke liye zyada details mil sakein.
Step 3: ‘Auto Enhance’ Ya ‘One-Click AI’ Feature Apply Karein
Image upload hone ke baad, tool ke main dashboard mein aapko One-Click AI Photo Enhancement ya “Auto Enhance” ka button dikhega. Jaise hi aap is par click karenge, AI apna scanning process shuru kar dega. Is process mein 5 se 10 second lag sakte hain, jahan AI aapki photo ka noise reduce karega, blur hatayega, aur lighting ko fix karega.
Step 4: AI Intensity Aur Sliders Ko Manually Adjust Karein (Most Important)
Sirf ek click karke chhod dena sabse badi galti hai. AI kabhi-kabhi cheezon ko over-process kar deta hai jisse skin plastic jaisi lagne lagti hai. Enhance hone ke baad, aapko screen par ek Intensity Slider dikhega. Is slider ko 100% se kam karke 70% se 80% ke beech set karein. Isse aapki photo sharp bhi hogi aur original skin texture (pores aur real look) bhi bacha rahega.
Step 5: Specific Elements Ko Check Aur Fix Karein
Ab apni photo ko zoom in karein. Khaskar aankhon (eyes), daanto (teeth), aur baalon (hair) ko dhyan se dekhein. Kai baar AI in parts ko thoda ajeeb ya distorted bana deta hai. Advanced tools mein aapko Face Recovery ka ek alag toggle milta hai. Agar face unnatural lag raha hai, toh usey thoda kam kar lein.
Step 6: Basic Color Correction Add Karein
AI ne aapki image ko sharp toh kar diya, lekin colors ka mood set karna aapka kaam hai. Wahin tool ke andar basic settings mein jaakar Contrast, Vibrance, aur Shadows ko halka sa tweak karein. Agar background bahut dark hai, toh shadows ko thoda increase kar dein.
Step 7: High-Quality Format Mein Export Karein
Jab aap final result se 100% satisfy ho jayein, toh export button par click karein. Hamesha apni enhanced photo ko PNG format ya High-Quality JPEG (100% slider) mein save karein. Ab aapki yeh super-sharp image Instagram post, YouTube thumbnail, ya client ko bhejne ke liye bilkul ready hai!
Creators Aur Editors Ke Liye Yeh AI Workflow Kyun Zaroori Hai?
Agar aap daily content banate hain, toh yeh workflow aapke liye kisi magic se kam nahi hai. Aaiye dekhte hain kyun:
- Massive CTR (Click-Through Rate) Boost: YouTube par audience sabse pehle aapka thumbnail dekhti hai. One-Click AI Photo Enhancement ka use karke aap apne thumbnails ke main subject ko ultra-sharp bana sakte hain, jisse log automatically aapki video par zyada click karte hain.
- Time-Saving Productivity: Ek professional editor ke paas hamesha time ki kami hoti hai. Manually noise reduction aur color correction karne mein ghanto lagte hain. Is step-by-step process ko follow karke aap apna kaam sirf 2 minute mein complete kar sakte hain.
- Low-Budget Shoots Ko Premium Look Dena: Kai baar beginners ke paas mehnge DSLR camera nahi hote aur wo budget phone se shoot karte hain. Is AI technology ki madad se aap apne phone ki photos ko bilkul studio-quality look de sakte hain.
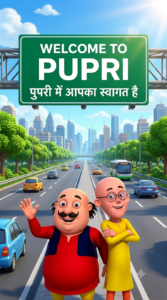
Prompt
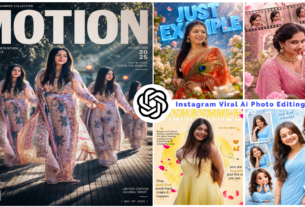
Create a vibrant, ultra-HD 3D cartoon-style travel poster inspired by the uploaded image. Keep the same highway perspective with a giant green overhead road sign that reads “WELCOME TO PUPRI” in bold white letters, with the Hindi text “पुपरी में आपका स्वागत है” below it. Preserve the bright blue sky, lush roadside trees, modern city skyline, and multilane expressway with moving traffic.
Place two cheerful cartoon characters standing in the foreground beneath the sign, smiling and posing toward the camera. One character is short and chubby with a black mustache, wearing a red kurta and dark blue vest, waving happily. The other is tall and slim, bald, wearing round glasses and a yellow kurta with folded arms and a cheerful expression.
Use vibrant colors, Pixar/DreamWorks-quality 3D animation, cinematic lighting, soft shadows, realistic road textures, depth of field, HDR, highly detailed, clean composition, ultra-sharp focus, 8K resolution, travel-poster aesthetic, fun and family-friendly atmosphere. Keep the characters expressive and the overall look premium and realistic while maintaining the original composition of the uploaded image.
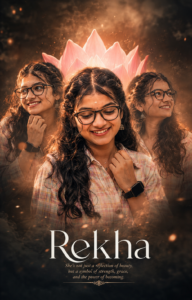
Prompt
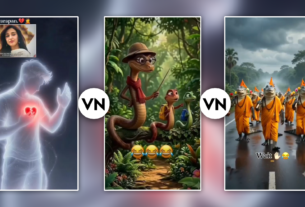
Prompt: Create an ultra-realistic cinematic portrait poster featuring the same person from the uploaded image in three different poses. Place one large smiling portrait in the center looking slightly downward with one hand near the collar, while two faded portraits appear behind on the left and right looking in different directions. The subject wears a light pastel checkered shirt, black-rimmed glasses, neatly styled black hair, light beard, and a black smartwatch. Add a large blooming pink lotus flower behind the center portrait as a symbolic background element. Use dramatic warm orange rim lighting, soft golden glow, volumetric fog, floating dust particles, dark smoky background, and premium color grading. Create a luxury movie-poster look with ultra-sharp facial details, realistic skin texture, cinematic depth of field, HDR lighting, high contrast, and soft bokeh. Add elegant white serif typography at the bottom displaying the name “Maksud” with a smaller stylish quote underneath. Highly detailed, photorealistic, 8K resolution, Adobe Lightroom color grading, Photoshop compositing, masterpiece quality, symmetrical composition, professional portrait photography, dramatic cinematic atmosphere. –ar 4:5 –stylize 250 –quality 2
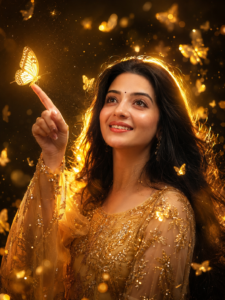
Prompt👇
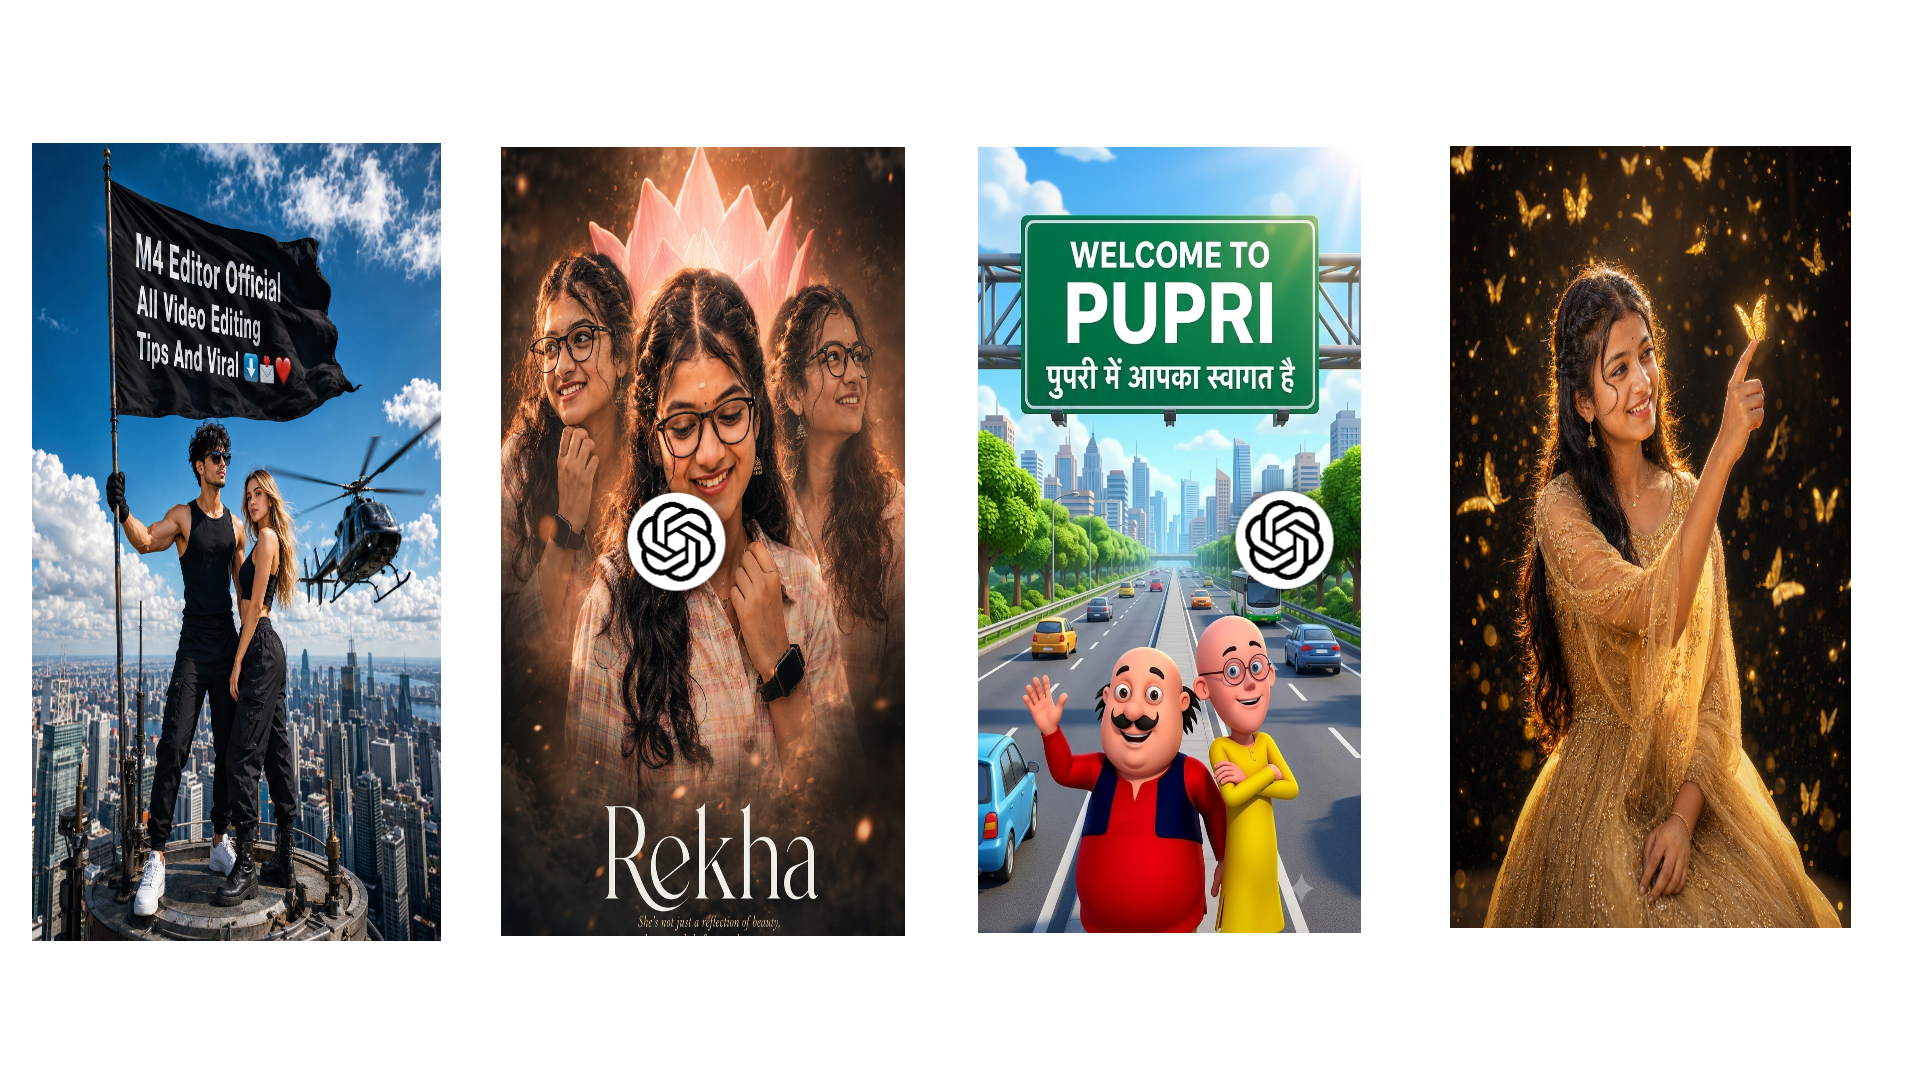
Ultra-realistic cinematic portrait of a beautiful young Indian woman wearing a luxurious golden glitter gown with elegant embroidered details and sheer flowing sleeves. She has long silky black hair, glowing flawless skin, a tiny black bindi, natural makeup, and a bright joyful smile while gently pointing her index finger toward a glowing golden butterfly resting on it. The background is dark with dozens of magical luminous butterflies flying around, warm golden bokeh lights, sparkling particles, floating light dust, and dreamy fantasy lighting. Strong golden rim light illuminates her hair, creating a radiant halo effect. Soft depth of field, DSLR photography, ultra-detailed face, realistic skin texture, vibrant colors, volumetric lighting, cinematic color grading, fantasy atmosphere, high contrast, premium portrait composition, 8K, HDR, masterpiece, ultra sharp focus, Instagram viral photo, photorealistic.
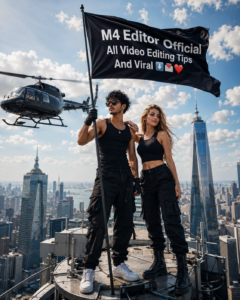
Photo Prompt 👇
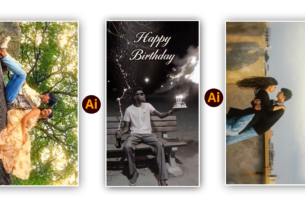
Ultra-realistic cinematic rooftop portrait of a stylish young man and a beautiful young woman standing together on the top of a futuristic skyscraper antenna, overlooking a massive modern city skyline during bright daylight. The man wears a black sleeveless tank top, black cargo pants, white sneakers, black sunglasses, black gloves, curly textured hair, and a confident expression while holding a tall flagpole. A large black flag waves dramatically in the wind with bold white text saying “M4 Editor Official All Video Editing Tips And Viral ⬇️📩❤️”. The woman wears a black sleeveless crop top, black cargo pants, black combat boots, long blonde hair, and poses naturally beside him. A realistic black helicopter flies close in the background with spinning rotor blur. Blue sky with fluffy white clouds, ultra-detailed skyscrapers, dramatic perspective, cinematic lighting, HDR, hyper-realistic skin textures, depth of field, vibrant colors, sharp focus, 8K, DSLR quality, high contrast, epic composition, Instagram viral aesthetic, Unreal Engine, masterpiece, photorealistic. –ar 4:5 –stylize 250 –quality 2
Video Prompt 👇
Use the uploaded man and woman as the exact faces and preserve their identity. Create an ultra-realistic cinematic 8-second video where they are standing together on the antenna platform of a futuristic skyscraper overlooking a massive modern city skyline during bright daylight. The man wears a black sleeveless tank top, black cargo pants, white sneakers, black gloves, black sunglasses, curly textured hair, and confidently holds a tall black flagpole. A large black flag waves dramatically in the strong wind with bold white text: “M4 Editor Official All Video Editing Tips And Viral ⬇️📩❤️”. The woman wears a fitted black sleeveless crop top, black cargo pants, black combat boots, and has long flowing hair blowing naturally in the wind. A realistic black helicopter flies close behind them with spinning rotor blur, circling the rooftop. The camera begins with a dramatic low-angle close-up, slowly cranes upward, then performs a smooth cinematic orbit around the couple while revealing the breathtaking skyline. Their clothes and hair flutter realistically in the wind. Bright blue sky with fluffy white clouds, cinematic sunlight, HDR lighting, realistic reflections, volumetric lighting, hyper-detailed skin, depth of field, epic scale, Unreal Engine 5 quality, DSLR realism, high contrast, vibrant colors, razor-sharp focus, photorealistic, masterpiece, Instagram viral aesthetic, 8K, 4:5 vertical, 24fps, smooth cinematic camera motion, no face distortion, preserve facial identity, realistic anatomy.


Bonus Tip: AI Aur Lightroom Ka Smart Cinematic Combo
Ek secret editing trick jo main hamesha apne high-end professional projects mein use karta hoon, wo hai AI aur manual color grading ka ek smart combination.
Sirf AI tool par poori tarah depend mat rahiye. Sabse pehle apni low-quality image ko AI enhancement app (jaise Remini) mein dal kar uski perfect sharpness aur missing details wapas le aaiye. Jab image puri tarah HD ho jaye, toh us enhanced photo ko Adobe Lightroom (Mobile ya PC) mein import karein.
Ab is super-sharp photo par apna khud ka favorite Lightroom Preset apply karein ya manually Color Mix (HSL) aur masking tools ka use karein. Is workflow ka sabse bada fayda yeh hai ki photo ki clarity aur sharpness AI ki hogi, lekin color tone aur cinematic vibe aapki apni original hogi. Is trick se aapki image baaki sabhi ordinary creators se 100% unique dikhegi!
Conclusion
Dosto, digital creation ki duniya mein One-Click AI Photo Enhancement ek aisi revolutionary power hai jisne complex aur time-taking photo retouching ko behad aasan aur fast bana diya hai. Agar aap mere bataye gaye is step-by-step process ko apne daily editing workflow ka hissa bana lete hain, toh aap bahut saara time bacha kar apni creativity par zyada focus kar payenge. AI aapko better output zaroor deta hai, lekin us output ko natural aur engaging banana aapke apne hathon mein hai. Toh aaj hi in tools ko try karein, apna workflow fast karein, aur apne content quality ko next level par le jayein. Keep editing, keep growing!