Hello editors aur creators! Main hoon M4 Editor. 7+ saalon se video editing industry mein active rehne ke baad maine dekha hai ki kaise editing ke tools aur workflows waqt ke sath badal rahe hain. Apne YouTube channel m4editorofficial (13.6K+ subscribers) aur Instagram page m4_editor_official (145K+ followers) par main daily viral editing secrets, advanced visual hacks, aur trend creation strategies share karta hoon. Is website ko banane ka mera sabse bada maqsad yahi hai ki har beginner creator ko authentic video editing guidance, trending AI workflows, aur real practical knowledge bilkul free mein mil sake taaki aap kisi paid course par paise kharch kiye bina ek pro editor ban sakein.
AI Se Trending Photo Video Kaise Banaye: Complete Beginner-Friendly Guide M4 101
Aaj ke time par social media platforms jaise Instagram Reels, YouTube Shorts, aur TikTok par daily naye-naye visuals viral hote rehte hain. Kabhi hyper-realistic 3D AI avatars, toh kabhi aesthetic cinematic AI photos jo ek tap mein high-quality videos mein convert ho jaati hain. Agar aap ek creator hain, toh aapne bhi zaroor socha hoga ki log itne aesthetic visuals bina kisi heavy setup ya expensive camera ke kaise bana rahe hain? Answer bilkul simple hai—AI tools aur smart editing workflows.
Lekin sach baat toh yeh hai ki zyada tar log abhi bhi AI ka sahi tarika nahi jaante. Wo random prompts daalte hain aur low-quality visuals generate karke disappointed ho jaate hain. Is detailed step-by-step guide mein hum baat karenge ki AI se trending photo video kaise banaye aur kaise aap AI-generated graphics ko apne video editing timeline par professionally polish karke viral content create kar sakte hain.
1. High-Detail AI Image Generation: Correct Prompt Engineering Setup
AI se video banane ka sabse pehla aur sabse important step hota hai ek high-resolution, sharp, aur visually attractive base photo generate karna. Jab tak aapki base image strong nahi hogi, tab tak usse banne wali video mein wo punch aur clarity nahi aayegi.
Midjourney, Bing Image Creator aur Leonardo AI Ka Smart Use
Base image generate karne ke liye aap Bing Image Creator (DALL-E 3), Midjourney, ya Leonardo AI jaise free/freemium tools ka use kar sakte hain.
- Lighting Specifications: Prompt mein hamesha specific lighting mentions karein. Generic “cool photo” likhne ke bajaye “cinematic rim lighting, volumetric soft shadows, 8k resolution” jaise terms use karein.
- Camera Shot Angle: Image ka framing define karein. For example: “Extreme close-up shot, 85mm lens, depth of field with blurred background”.
- Subject Details: Subject ki clothing, expression, aur environment ko clearly describe karein.
Editing Insight: Single image generate karne ke bajaye hamesha 3-4 variations generate karein taaki jab aap unhe video timeline par layein, toh aapke paas alternative angles aur cutaway options available hon.
2. Image-To-Video AI Animation: Realistic Motion Effects
Ek baar jab aapki high-quality trending image ready ho jaati hai, toh next step use ek smooth, continuous video animation mein badalna hota hai. 2026 mein AI image-to-video tools pehle se kahin zyada realistic camera movements offer karte hain.
Runway Gen-2, Luma Dream Machine aur Kling AI Workflows
Image ko video mein animate karne ke liye in platforms par apni photo upload karein aur specific motion prompt dein.
- Targeted Camera Motion: Prompt mein likhein “Subtle slow zoom in, camera panning right, slow-motion hair movement”. Unnecessary heavy motion se AI artefacts (visual glitches) aane lagte hain.
- Motion Brush Feature: Runway ya Luma jaise tools mein Motion Brush ka option milta hai. Image ke sirf usi part ko mask karein jise aap move karna chahte hain (jaise cloud movement, water flow, ya eye blink).
- Maintain Consistency: Subject ke face ko static rakhte hue background elements mein slow dynamic motion add karein. Isse video ekdam clean aur professional lagti hai.
3. High-Quality Audio Sync, Sound Design aur Voice Generation
Visuals chahe kitne bhi sundar hon, agar video ka audio weak hai toh user 2 seconds mein scroll-away kar dega. AI se trending photo video banate waqt Sound Design video ka 50% success define karta hai.
ElevenLabs aur Custom SFX Layers
Sahi audio build karne ke liye in steps ko follow karein:
- Natural AI Voiceover: ElevenLabs ya Murf AI ka use karke human-like voiceover generate karein. Voice mein natural pauses aur pitch modulation select karein.
- Atmospheric Background Score: Video ke mood ke hisab se trending background music select karein. Aesthetic videos ke liye Lofi/Ambient beats aur action-based visuals ke liye Phonk/Cinematic Risers best kaam karte hain.
- Layering SFX (Sound Effects): Timeline par har visual change ke sath sound effect Sync karein. Jab scene change ho toh Swoosh SFX, jab koi element appear ho toh Deep Bass Drop ya Click SFX ka use karein.
4. Professional Video Editing: Speed Ramping, Cuts aur Transitions
Aapke paas AI video clips aur audio aa gaye hain, lekin abhi yeh raw material hai. Real magic tab hota hai jab aap ise CapCut, Premiere Pro, ya DaVinci Resolve par laakar timeline editing karte hain.
High-Retention Timeline Techniques
- Beat-Synced Cuts: AI clips ko kabhi bhi random length par na chhodein. Background music ke beat drops/snare hits ke sath apni video clips ke cuts ko exact align karein.
- Speed Ramping (Fast-Slow-Fast): AI clips par Speed Ramp curve apply karein. Start ko 1.5x fast rakhein, beech mein 0.5x slow-mo karein, aur end par wapas 1.2x speed kar dein. Isse visual flow extremely dynamic ban jata hai.
- Colour Grade Alignment: Sabhi AI clips ki lighting alag ho sakti hai. Timeline par ek Adjustment Layer lagayein aur sabhi clips par identical LUT ya Color Correction apply karein taaki puri video ka visual tone consistent rahe.
5. Kinetic Typography, Subtitles aur Visual Hooks Setup
Research kehti hai ki lagbhag 60% log Instagram Reels aur Shorts mute mode par dekhte hain. Iska matlab agar aapki video par bold, attractive captions nahi hain, toh aap apni aadhi audience lost kar rahe hain.
Auto-Captions Plus Dynamic Animations
- On-Screen High-Contrast Captions: Auto-caption tools ka use karke subtitles generate karein aur Yellow/White/Neon Green jaise high-contrast colours use karein.
- Word-by-Word Pop Effect: Subtitles ko puri line mein dikhane ke bajaye single-word pop-up format mein set karein. Isse viewer ka dhyan Screen par tika rehta hai.
- First 3-Second Text Hook: Video ke bilkul start mein screen par ek bold question ya eye-catching statement add karein (e.g., “Is AI Tool Ne Sab Kuch Badal Diya!”).
6. AI Video Resolution Upscaling aur Export Settings
Puri editing complete hone ke baad agar aapki video compression ki wajah se blurry ya pixelated dikhegi, toh social media algorithms use push nahi karenge. AI videos mein compression artefacts ko rokne ke liye specific export settings required hoti hain.
Top Export Benchmark Guide
- Topaz Video AI / CapCut HD Enhance: Edit complete karne ke baad video ko 1080p se 4K upscale karein taaki AI textures aur fine details sharp ho jayein.
- Aspect Ratio: Hamesha 9:16 Vertical Ratio (1080×1920) resolution mein export karein.
- Frame Rate & Bitrate: Video ko 60 FPS par export karein aur Bitrate ko 15 to 20 Mbps (H.264 / MP4 Format) par lock karein. High bitrate video ko Instagram compression se bachata hai.
Technical Setup Guide: AI Video Quality Optimisation
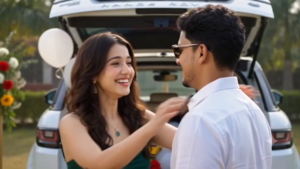
Video Prompt 👇
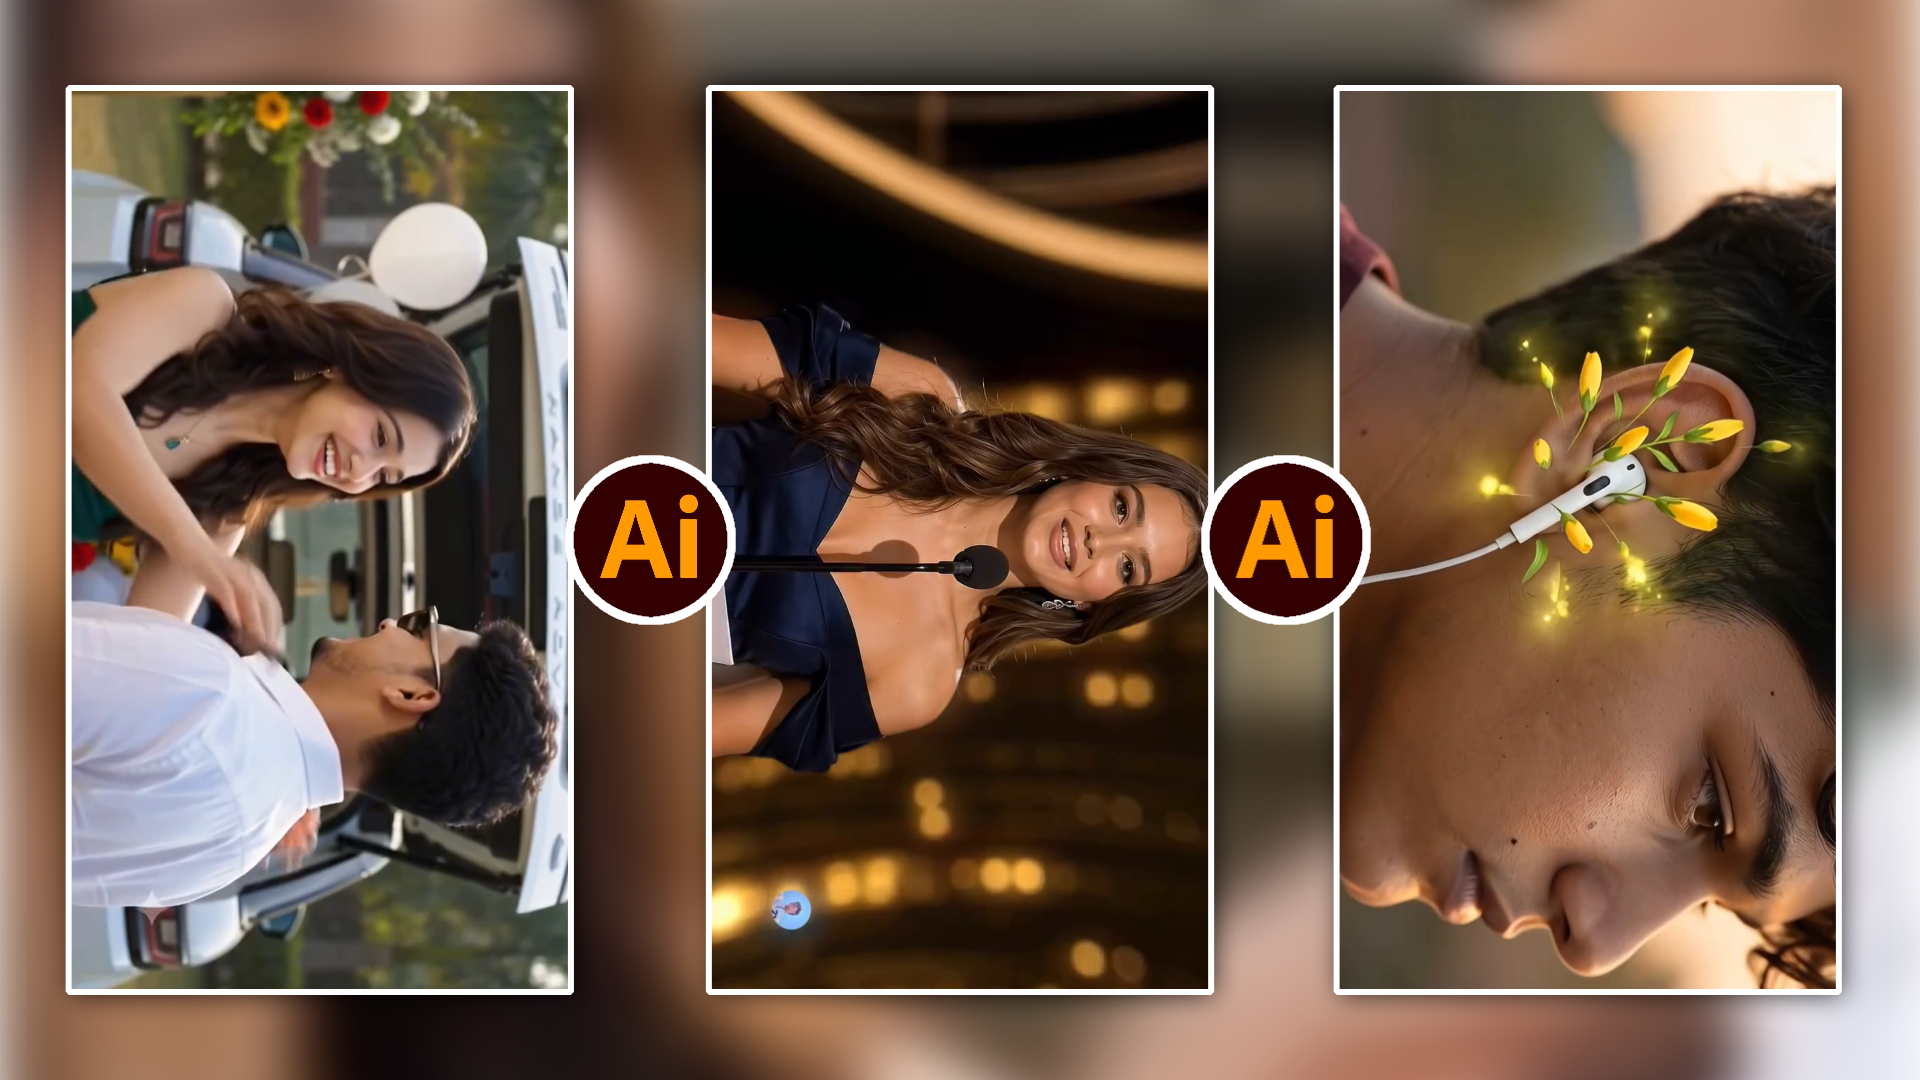
Here is a timeline-based breakdown of the key scenes in the video:
00:00 – 00:02: A man in a red-and-black plaid shirt opens the trunk of a Range Rover filled with white balloons and floral arrangements.
00:03 – 00:05: A close-up shows a woman in wedding attire, followed by a shot of the couple walking down the aisle together.
00:07 – 00:10: The woman, now in a floral summer dress, approaches the car trunk, while the man stands nearby smiling.
00:11 – 00:15: A close-up reveals a diamond engagement ring displayed inside a wooden ring box set against a backdrop of red and white roses.
00:16 – 00:21: The woman smiles warmly at the man, placing her arms around his neck in a happy embrace by the vehicle.
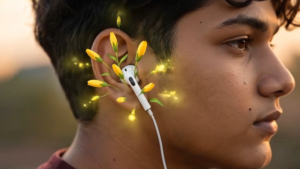
Video Prompt 👇
- Key Narrative Elements
- The Setup: A young man plugs wired earphones into his smartphone and plays a song titled “Kalyani”.
- Magical Visuals: As the music plays, magical golden light and yellow flowers sprout around his earphone, symbolizing how deeply the music touches his senses.
- Dreamy Environment: He walks down a quiet road lined with vibrant, colorful flowers under a warm golden sunset light. Even the traffic lights sprout blooming flowers and vines.
- Anime-Inspired Daydreams: Interspersed throughout the video are dreamy, anime-style illustrations depicting tender, affectionate moments with a young woman in a flower field—suggesting the song brings back sweet memories or longing for love
1. Photo Prompt 👇
Create an ultra-realistic DSLR-quality portrait using the uploaded reference image. Preserve the person’s face with a 100% exact face match, including facial structure, hairstyle, eyebrows, eyes, nose, lips, skin tone, light mustache, expression, and overall identity. Do not beautify or alter the face.
The person is seated confidently in the front row of a prestigious awards ceremony auditorium, wearing a luxury black tuxedo, white dress shirt, black waistcoat, and black bow tie. Keep the same sitting pose with both hands resting naturally on the armrests while looking directly at the camera.
Surround the subject with a realistic audience dressed in elegant black-tie attire. Use luxurious deep red theater seats, warm golden cinematic lighting, shallow depth of field, soft bokeh, and a premium Hollywood awards atmosphere. Maintain the empty seat beside the subject with a glowing white award-style logo, while the audience remains slightly blurred to emphasize the subject.
Capture the scene with 85mm lens, f/1.8, ultra-sharp focus, HDR, realistic skin texture, natural shadows, cinematic color grading, premium editorial style, 8K UHD, highly detailed, photorealistic, symmetrical composition, award-show ambience, no watermark, no extra people near the subject, and no facial changes.
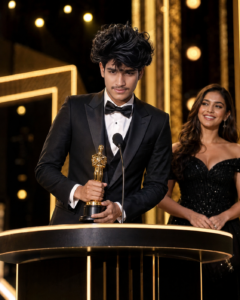
2 Photo Prompt 👇
Create an ultra-realistic DSLR-quality awards ceremony portrait using the uploaded reference image. Preserve the person’s face with a 100% exact face match, including facial structure, hairstyle, eyebrows, eyes, nose, lips, skin tone, light mustache, expression, and overall identity. Do not beautify, stylize, or alter the face in any way.
The person is standing confidently behind a premium black-and-gold awards podium on a grand Hollywood-style stage, wearing a perfectly tailored luxury black tuxedo with satin lapels, a white dress shirt, a black waistcoat, and a black bow tie. He is holding a prestigious golden Oscar-style award trophy naturally with both hands while looking directly at the camera. A slim professional microphone is positioned in front of him as if delivering an acceptance speech.
On the right side of the stage, a glamorous female presenter in an elegant black off-shoulder evening gown stands smiling toward the winner. Keep her slightly out of focus so the subject remains the center of attention.
The background features luxurious golden stage lighting, glowing bokeh, illuminated geometric light frames, cinematic warm highlights, soft HDR lighting, realistic reflections, shallow depth of field, premium Hollywood awards-show ambience, and elegant black-and-gold décor.
Capture the image with an 85mm lens, f/1.8, ultra-sharp focus, HDR, realistic skin texture, natural shadows, cinematic color grading, premium editorial photography style, 8K UHD, highly detailed, photorealistic, symmetrical composition, luxury event atmosphere, no watermark, no text, no logo, no facial changes, and no extra people near the subject. The final result should look like an authentic high-end award ceremony photograph.
Video Prompt 👇
Step 1 – Opening Scene
Elegant awards stage with warm golden lighting.
Female presenter in a navy-blue off-shoulder gown speaking at a microphone.
Soft golden bokeh lights in the background.
Cinematic camera slowly pushes in.
Step 2 – Flash Transition
Bright gold flash.
Floating light particles.
Motion blur with glowing streaks.
Smooth zoom transition.
Step 4 – Name Animation
Large glowing 3D text appears: M4 EDITOR OFFICIAL
Gold metallic typography.
Spark particles around the text.
Cinematic light sweep across the letters.
Thank You Scene
Giant glowing “THANK YOU” Everyone fills the background.
Warm orange and golden lighting.
Trophy in the subject’s hand.
Camera slowly pans left to right.
Agar aapki generated videos mein unnatural warping, blur, ya low quality ki problem aati hai, toh algorithm ke mutabiq yeh setup apply karein:
- Resolution Matching: Base photo hamesha minimum 2K resolution mein export karein.
- Avoid Heavy Prompts: AI video generator mein ek sath bohot saare complex movements na daalein.
- Frame Interpolation: CapCut ya Premiere Pro mein Optical Flow enable karein taaki slow-motion completely smooth ho sake.
- Sharpness Masking: Video editor mein Unsharp Mask filter apply karke facial features aur eyes ko sharp karein.
Bonus Tip: Preset Template Creation for Fast Output
Ek professional video editor hone ke naate mera sabse bada secret workflow acceleration hai. Agar aap har video ke liye zero se AI prompts aur timeline setup karenge, toh aapka bohot waqt barbad hoga.
Smart Workflow Blueprint
- Maintain a Prompt Library: Apne Notion ya Notepad par High-Converting AI Prompts ki ek categorized sheet bana kar rakhein (Aesthetic, Cyberpunk, Cinematic Portrait).
- Create Custom Editing Templates: Apne video editing software mein pehle se text animation presets, sound effects bin, aur LUT adjustment layers save karke rakhein.
- Batch Processing Strategy: Ek hi din mein 5-10 AI images generate karke unki animations nikal lein aur agle din unhe batch mein edit karein. Isse aapka turnaround time 70% tak kam ho jayega.
Conclusion
Toh doston, umeed hai aapko samajh aa gaya hoga ki AI se trending photo video kaise banaye aur kaise ise ek professional editing workflow ke sath combine karke high-quality viral content taiyar kiya jata hai. AI sirf ek tool hai, lekin asli creative vision aapka apna hota hai. Aap jitni zyada prompt structure, sound design, aur timeline pacing ki practice karenge, aapki videos utni hi zyada stand-out karengi. Aaj hi in techniques ko apne video editor par try karein, naye AI tools ke sath experiment karein, aur apni video editing skills ko ek naye level par lekar jayein!